Try a New Technique: Add Instant Texture with Embossing Folders
If you’ve ever looked at a handmade card and wondered how the background feels raised or textured — that’s the magic of dry embossing! This week in our Try a New Technique theme, we’re exploring one of the easiest ways to level up your paper-crafting skills: embossing folders.
Dry embossing adds depth, texture, and visual interest to any project — no fancy supplies required. All you need is your die-cutting or embossing machine, a favourite embossing folder, and cardstock.
Before we jump into the techniques, take a few minutes to listen to this week’s Crafting Confidence episode — it’s all about adding depth, dimension, and texture to your handmade cards using embossing folders.
Tune in to the
Crafting Confidence Podcast
Welcome to Crafting Confidence, your go-to podcast for paper crafters who want to create with more joy, purpose, and confidence. Each episode is a 10–15 minute listen filled with creative insights, mindset tips, and stories that help you embrace progress over perfection — one handmade card at a time.
Press play while you craft or take a creative break — inspiration is just a listen away!
What Is Dry Embossing?
Dry embossing is the process of pressing a design into paper to create a raised (embossed) or recessed (debossed) impression. The design is formed by running cardstock between the two sides of an embossing folder through your machine.
Unlike heat embossing, which uses powders and a heat tool, dry embossing is completely mess-free. It’s perfect for beginners who want to add elegant detail without extra steps — and it gives every card that instant “wow” factor.
Standard vs 3D Embossing Folders
Not all folders are the same! Understanding the difference will help you get the best impressions every time.
- Standard Embossing Folders have a single-layer design that produces lighter, even texture. They’re great for subtle backgrounds or layering behind patterned paper.
- 3D Embossing Folders feature deeper etched details and multiple layers of dimension. They create a sculpted look but require a different sandwich — usually one less plate than standard folders. Always check your machine’s instructions.
👉 Pro Tip: When using 3D folders, mist your cardstock lightly with water before embossing. It softens the fibres, helping them stretch into the design without cracking.
Card Ideas Using Embossing Folders
I love using embossing folders because they work with any style — from soft and serene to bright and festive. Here are some of my favourite recent projects that show just how versatile this technique can be.
Soft Pastel Texture – “You’re the Absolute Best”
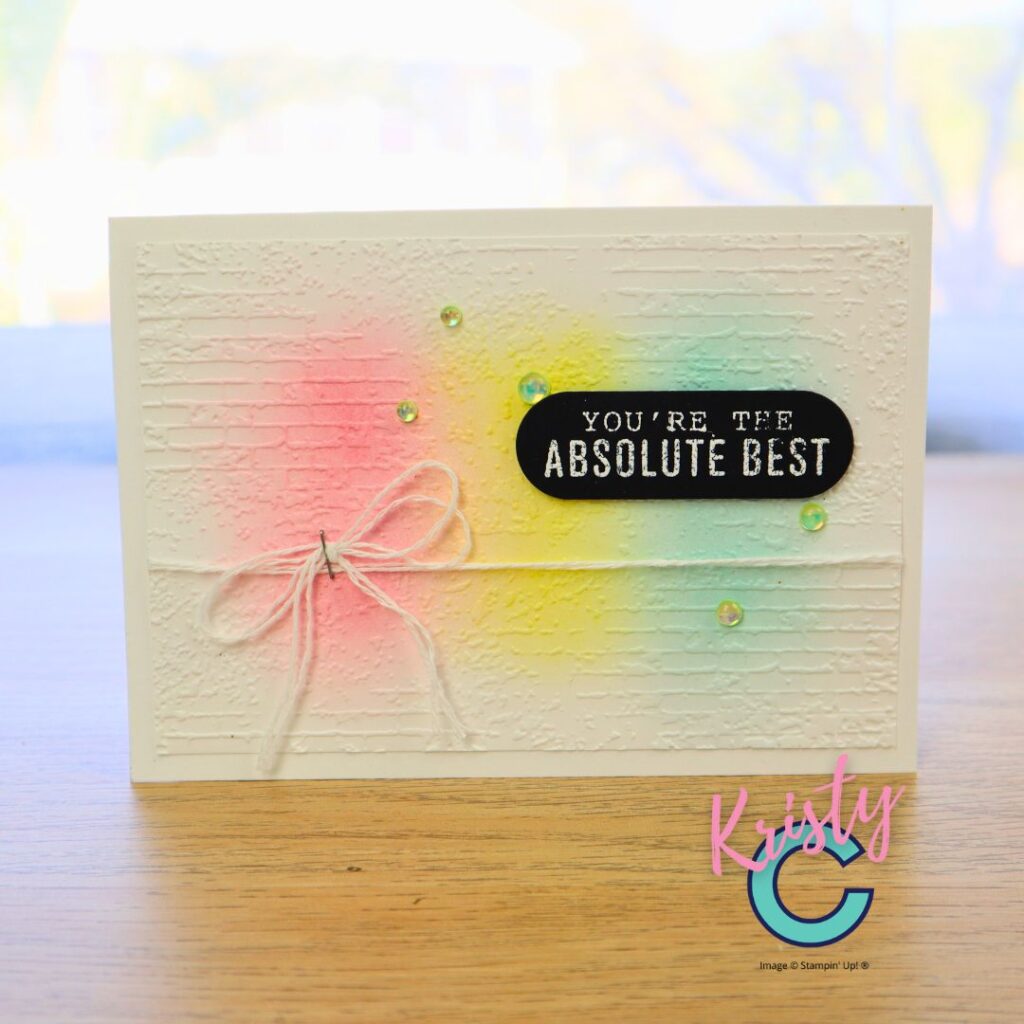
This cheerful card combines ink blending and embossing for a dreamy textured finish. The Exposed Brick 3D Embossing Folder adds structure behind the softly blended Flirty Flamingo, Daffodil Delight, and Coastal Cabana inks. The colour highlights the raised texture, and the white twine bow keeps it simple and sweet.
👉 Try this look: Blend ink onto cardstock after embossing — the raised areas catch colour beautifully. If you enjoyed this, check out my guide on Ink Blending Basics for Beginners
Elegant Sympathy Card – “With Deepest Sympathy”
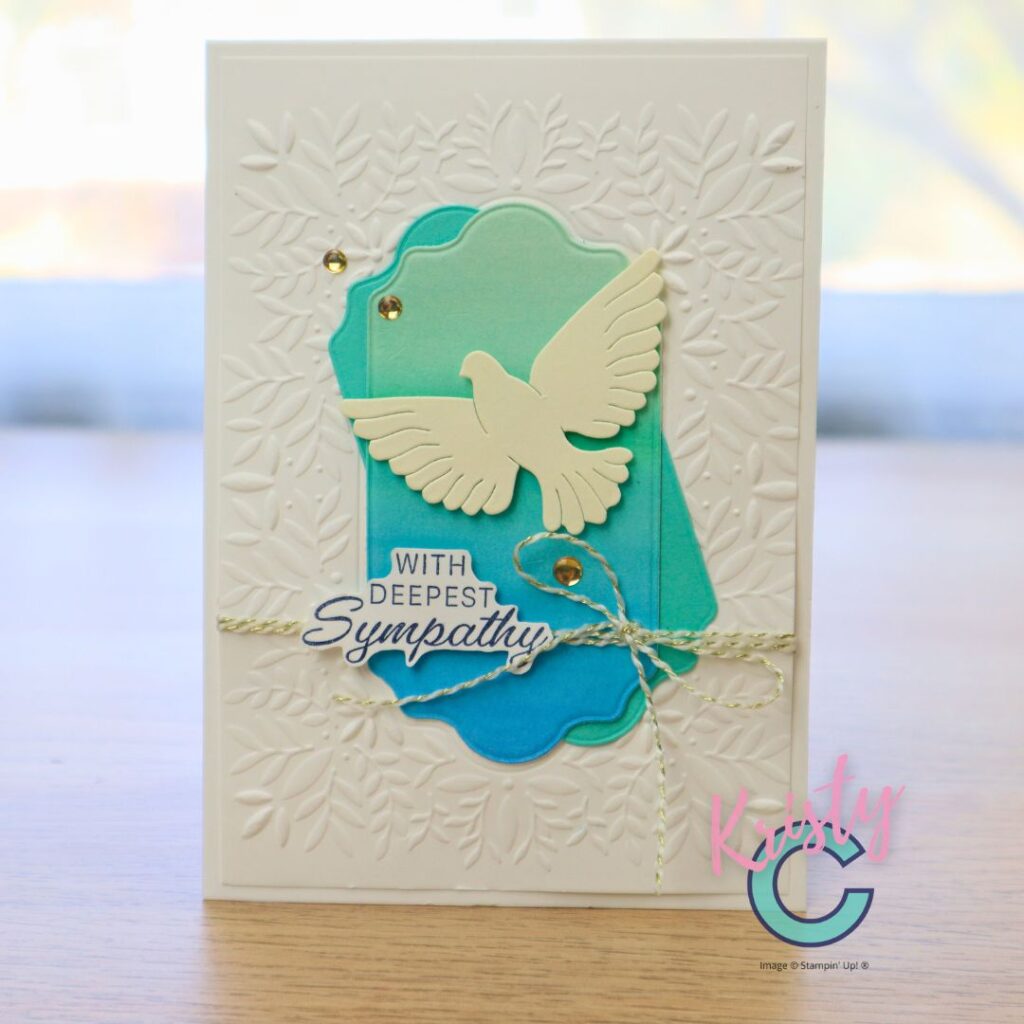
A clean white background embossed with leafy texture sets a peaceful tone. Layering soft teal die-cut panels and a Very Vanilla Dove silhouette creates calm contrast. This design proves you don’t need bright colours to make a big impact — texture does the talking.
👉 Design Tip: For sympathy or minimalist cards, stick to monochrome or tone-on-tone palettes. Embossing adds quiet sophistication without clutter.
Festive & Dimensional – “Season’s Greetings”

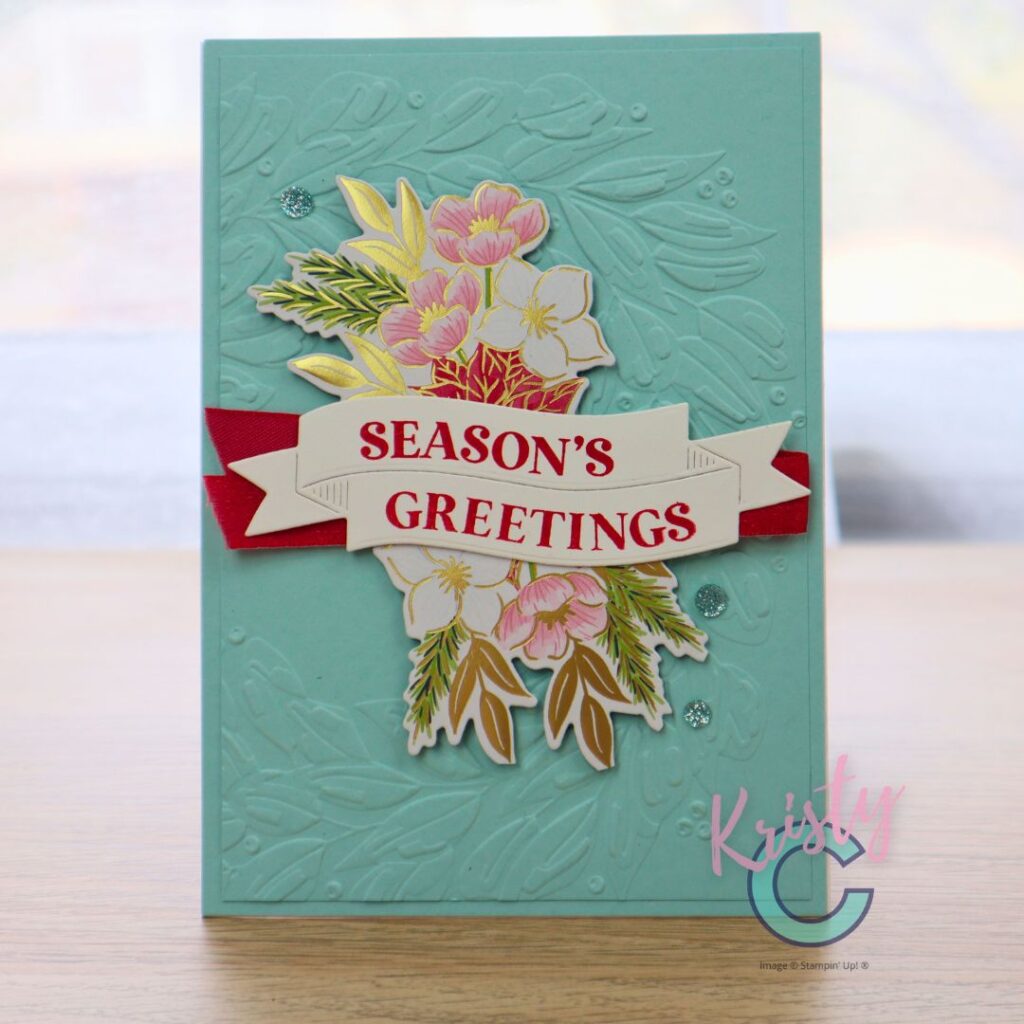
Embossing folders shine on holiday cards! Combine metallic patterned paper with an embossed background for instant luxury. The raised pine-branch texture echoes the printed design, tying everything together. Whether on soft Pool Partycardstock or Cherry Cobbler, the result feels rich and layered.
👉 Try this: Emboss half your background and leave the other half flat for a modern split-panel look.
Decor Accent – “Love” Dove Ornament
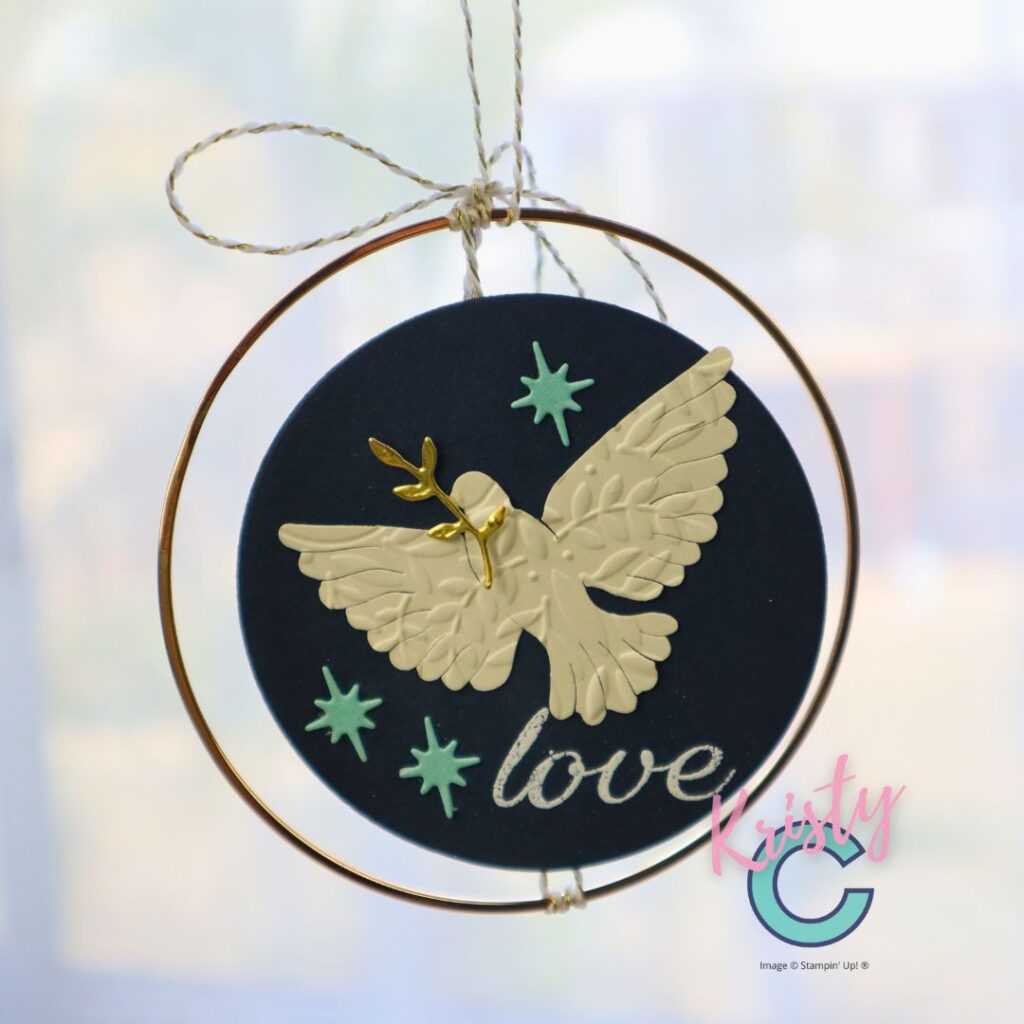
Embossing folders aren’t limited to cards! Here, an embossed dove is layered onto a circular ornament, accented with stars. It’s a perfect example of using folders for 3D projects — from gift tags to ornaments and scrapbook elements.
👉 Creative Idea: Emboss die-cut shapes before assembling them. It adds subtle texture that catches light from every angle.
Troubleshooting Common Embossing Issues
Even simple techniques have quirks. Here are quick fixes for the most common embossing problems:
- Cracking or tearing cardstock: Lightly mist with water first or use smoother cardstock.
- Uneven texture: Check that the folder is centered and the plates aren’t warped.
- Folder slipping: Add a small piece of washi tape to hold it in place before rolling through.
- Over-embossed or squashed detail: Reduce pressure by removing a plate or using a thinner shim.
Keep experimenting until you find the perfect “sandwich” for your specific machine and folder type.
Beginner Shopping Guide: Where to Start
If you’re ready to add embossing folders to your craft stash, start with versatile designs you’ll reach for year-round:
- Leafy or Floral Folders – perfect for sympathy, birthday, or thank-you cards.
- Geometric Patterns – bricks, dots, or stripes for modern designs.
- Seasonal Textures – snowflakes or pine branches for holiday crafting.
All of these are available through my Online Strampin’Up! Store, and most coordinate beautifully with variety of stamp and die bundles.
Creative Ways to Use Embossing Folders
Once you master the basics, try these extra techniques to stretch your folders even further:
- Partial Embossing – Emboss only part of your cardstock by leaving a section outside the folder. Great for adding texture behind a focal image.
- Ink Your Folder – Apply ink directly to the raised side before running through the machine to create an instant background print.
- Emboss Vellum – For a soft, frosted look. Vellum shows off the texture beautifully.
- Patterned Paper Embossing – Transform printed designs by adding subtle raised detail for extra dimension.
- Double Embossing – Emboss once, rotate the cardstock, and emboss again for a cross-hatch effect.
Each method gives a slightly different result — perfect for experimenting and developing your own style.
Getting Started Checklist
As you experiment with different embossing folders, take note of which designs suit various occasions — soft florals for sympathy cards, bold geometrics for birthdays, and festive patterns for holidays. Building this awareness will make you a more confident and intentional crafter.
Before you dive in, here’s everything you need for dry embossing success:
✅ Die-cutting or embossing machine (e.g., Stampin’ Cut & Emboss Machine)
✅ One or two embossing folders — start with a standard floral or geometric pattern
✅ Cardstock (smooth, good quality)
✅ Spritz bottle with water
✅ Optional: inks, blending brushes, or daubers for colouring the embossed surface
Keep your first projects simple — you’ll be amazed at how professional they look!
Watch the Technique in Action
This week’s video tutorial walks you through:
- How to build your embossing sandwich correctly
- The difference between standard and 3D folders
- A fun project to create using your embossing folders.
👉 [Watch on YouTube: Coming Soon]
If you’re a visual learner, this quick tutorial is the perfect companion to today’s projects.
Dry embossing is one of those magical “ah-ha” techniques that instantly boosts your creative confidence. With just one pass through your machine, plain cardstock transforms into a beautifully textured canvas.
Whether you prefer soft pastel blends like the You’re the Absolute Best card, serene designs like With Deepest Sympathy, or bold holiday layers like Season’s Greetings, embossing folders let you experiment fearlessly.
So dust off your folders, try a new one this week, and see how texture brings your cards — and your creativity — to life.
💬 Which of these project ideas will you try first? Share your thoughts below or tag me on Instagram — I love seeing what you create!