One Layout, Many Cards: How to Simplify Your Holiday Cardmaking This Season
The holiday season is one of the most joyful times of the year — but it can also be the busiest. If you’re looking for an easy card layout for beginners, this post will show you how one simple design can inspire endless holiday cards.
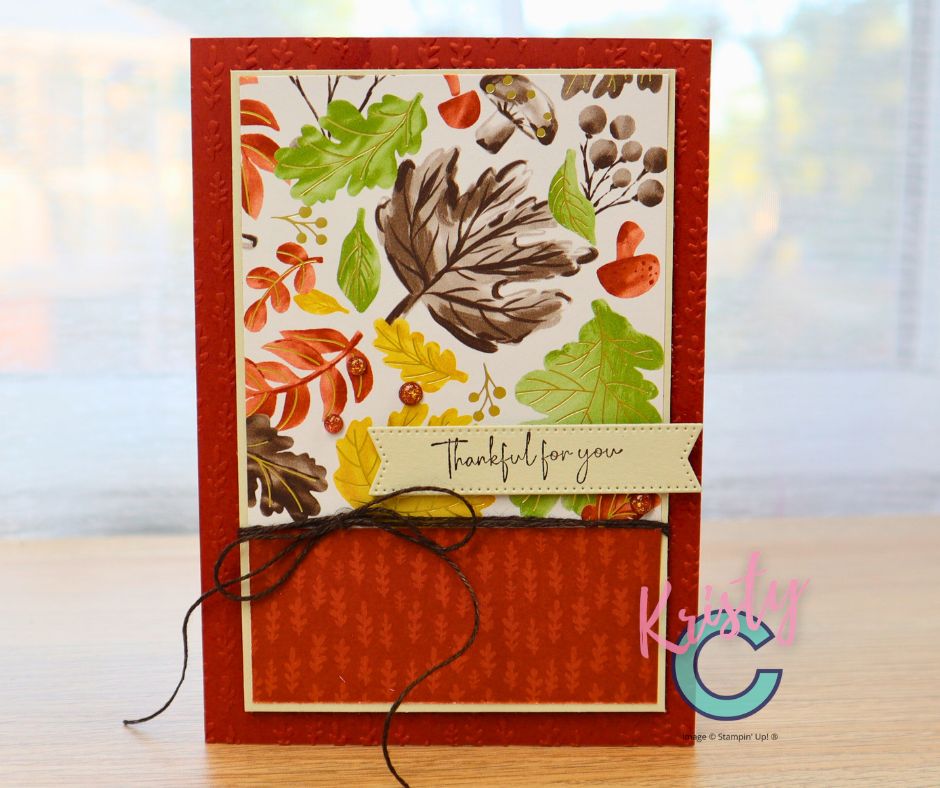
If you’ve ever found yourself surrounded by pretty paper, stamps, and ink pads wondering where to start, you’ll love this week’s Festive Foundations focus. I’m sharing how to create multiple beautiful cards from one simple layout — no stress, no overthinking, just creative fun.
This beginner-friendly approach to cardmaking helps you save time, use your supplies wisely, and end up with a coordinated, professional-looking set of handmade holiday cards you’ll be proud to send.
Why One Layout Is a Game-Changer for Beginners
Using an easy card layout for beginners is one of the simplest ways to build confidence and consistency in your cardmaking.
When you’re new to cardmaking, the hardest part often isn’t stamping or cutting — it’s designing. You want your card to look balanced and beautiful, but figuring out where everything goes can be intimidating.
That’s why I love working from a single card layout (also known as a sketch). It’s like having a creative map — you always know where to start, and you can still make each card your own.
Here’s why this approach works so well, especially during the holidays:
- It reduces decision fatigue. No need to reinvent the wheel with every card. The layout is already done — just change your paper or colours.
- It saves time. You can cut, stamp, and assemble in batches. Perfect for those long holiday card lists!
- It keeps your design consistent. Whether you’re making 5 cards or 50, they’ll look cohesive and intentional.
- It helps build creative confidence. Once you master one layout, you can tweak it and watch your skills grow week by week.
What Is an Easy Card Layout for Beginners (and How to Use One)?
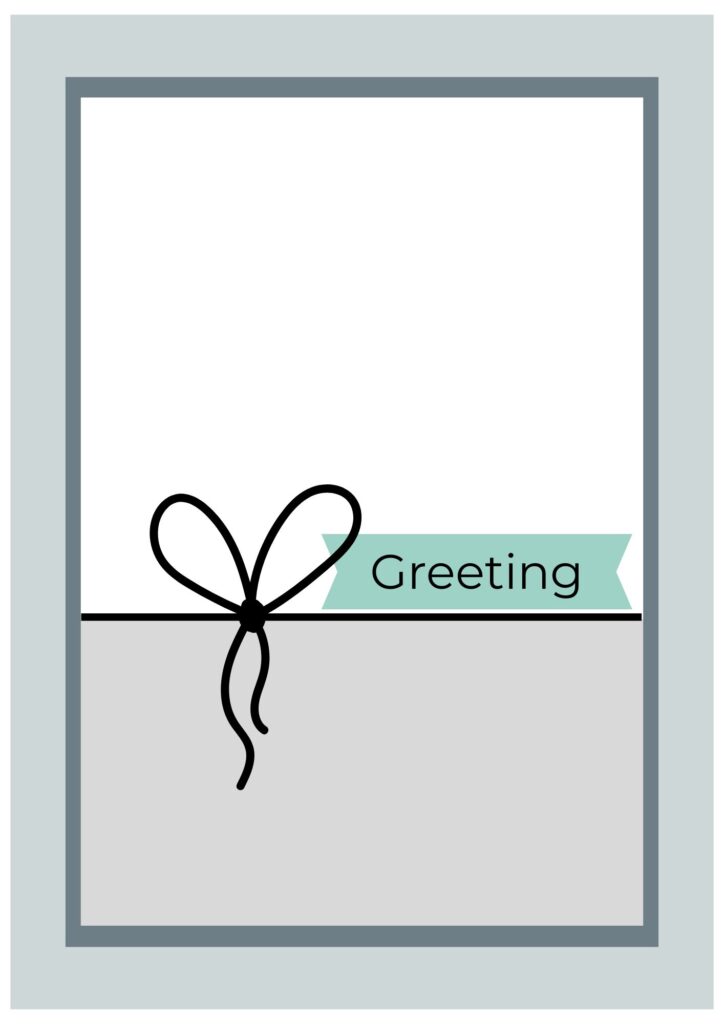
An easy card layout (or sketch) for beginners is a simple visual guide that shows where to place your main elements — background, focal image, sentiment, and embellishments. Think of it as the blueprint for your design.
Here’s how to make the most of it:
- Start with the sketch. Treat it like a flexible plan — not a rulebook.
- Choose your focal point. A stamped image, die cut, or patterned paper panel works perfectly.
- Add a sentiment. Position it in the same place across all cards for consistency.
- Finish with embellishments. Rhinestones, sequins, or ribbon can add sparkle — but keep them minimal for a clean, beginner-friendly look.
Step-by-Step: How to Make Many Cards from One Easy Card Layout for Beginners
Let’s walk through the process using one layout and a few small variations. You’ll see how easy it is to stretch one idea into many beautiful handmade holiday cards.
1. Pick Your Base Design
Start with an A6 (or A2) card base — a classic size that fits most envelopes. Cut a coordinating mat and a focal panel based on your layout.
👉 Tip: Use a paper trimmer and bone folder for clean, professional edges.
2. Choose a Colour Palette
Keep it simple with two to three coordinating colours. Traditional red and green always work, but soft pastels, neutrals, or even navy and gold can feel elegant and fresh.
If you’re not sure where to start, use a patterned paper you love and pull your colour combo from it.
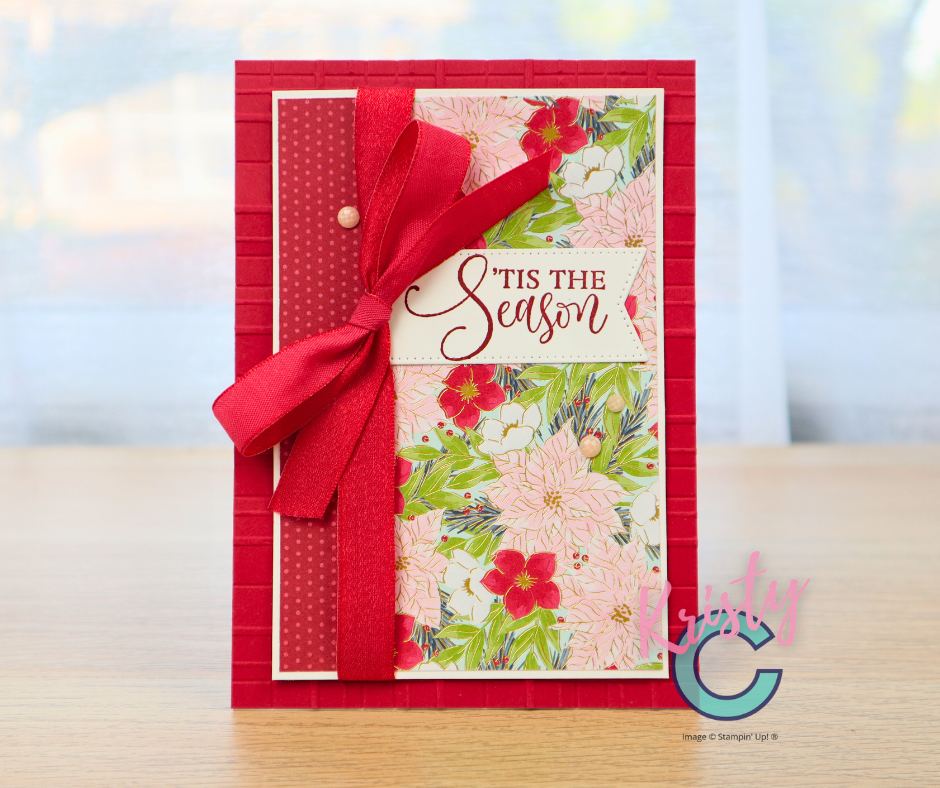
3. Add Patterned Paper or Texture
Swap out your background panels using different patterned papers or embossed cardstock. This small change instantly transforms each card while keeping the layout the same.
✨ Pro Hack: Use the same embossing folder for all your cards, but rotate the direction or pair it with different paper colours for variety.
4. Create a Focal Point
Choose one stamp set or die cut that you can repeat easily — think Christmas trees, ornaments, snowflakes, or simple sentiment shapes.
You could stamp the same image on all your cards, or alternate between two coordinating images. This keeps things visually interesting without extra planning.
5. Add Your Sentiment
Position your sentiment in the same place across each card. It creates balance and rhythm, even when the background changes.
You can stamp directly onto your card, heat emboss for a little shine, or layer your sentiment on a small label.
6. Embellish (But Keep It Simple)
A few sequins, a bow, or a touch of Wink of Stella is all you need. When you’re batching, simple embellishments are your best friend.
7. Repeat and Vary
Now that you’ve nailed your first card, repeat the process — changing just one thing each time. Try a new paper, rotate the layout, or switch up the colour combo.
Before you know it, you’ll have a full stack of coordinated, handmade cards — all built from one easy design.
Batch-Making Made Simple for Beginners
Once you master this easy card layout for beginners, batch-making becomes faster and more fun — especially during the busy holiday season.
If you want to make 10, 20, or even 50 cards this season, batching is the secret. Instead of making one card from start to finish, do one step at a time across all cards.
Here’s a simple batching order you can try:
- Cut all your card bases and layers.
- Stamp all your images or sentiments.
- Add adhesive and assemble.
- Finish with embellishments.
This approach saves tons of time, especially when you’re crafting in small bursts between other holiday tasks. Plus, it keeps your workspace tidy and your mind relaxed.
Variations You Can Try
Here are a few beginner-friendly ways to remix one layout:
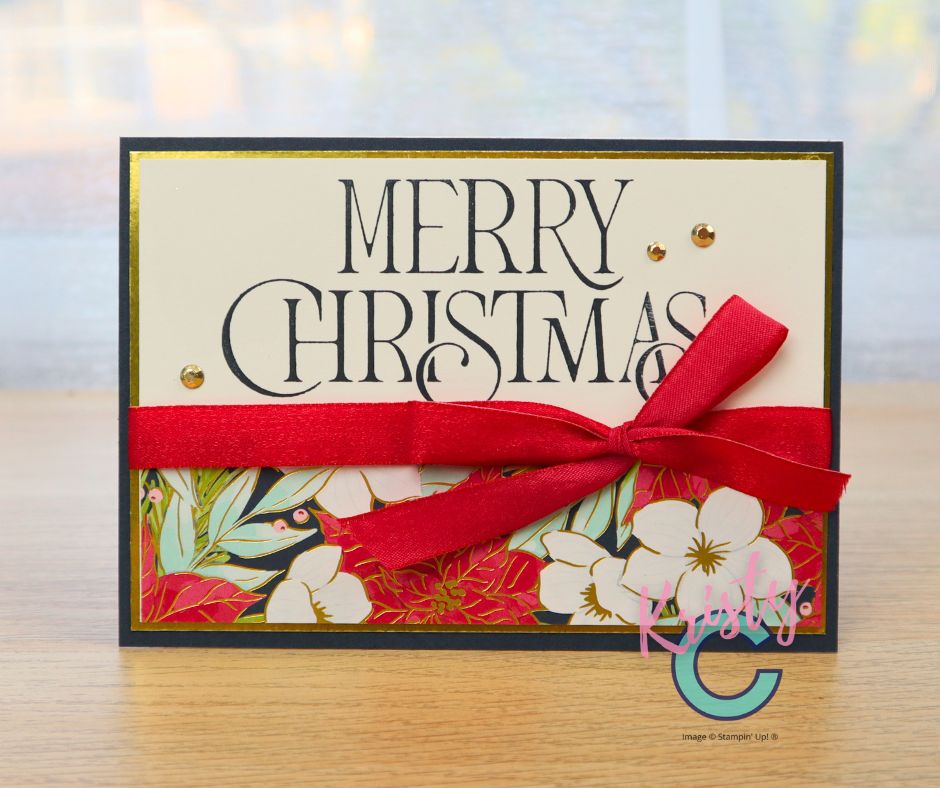
- Pattern swap: Use the same design but switch up your patterned paper for a totally new look.
- Orientation change: Rotate your layout from portrait to landscape.
- Colour shift: Try traditional, pastel, or even monochromatic holiday palettes.
- Focal update: Replace a stamped image with a die cut, tag, or sentiment block.
- Add texture: Use dry embossing or ink blending to give your panels depth.
The beauty of this method is that it encourages creative experimentation — without any pressure.
Take a look at your crafting table — how many supplies do you already have that could fit into one simple layout? Sometimes creativity blooms when we work within limitations instead of trying to use everything at once.
No matter what paper or colours you choose, this easy card layout for beginners can adapt to any theme, from Christmas to birthdays and beyond.
Challenge yourself this week:
Use one layout to make at least three cards, and notice how each one reflects your unique style.
Remember, every creative journey starts with one confident step — or in this case, one simple card layout.
This holiday season, give yourself the gift of simplicity. Cardmaking doesn’t have to be complicated to be meaningful. With one easy layout, you can batch beautiful cards, enjoy the process, and still have time to relax and celebrate.
So, grab your favourite patterned papers, put on your festive playlist, and start crafting your holiday cards the easy way.
Your handmade creations will mean so much more than anything store-bought — because they come from your heart and your hands.