3 Card Ideas with the Round About Messages Stamp Set
Sometimes a stamp set catches your attention because of the images.
Other times, it’s the sentiments that get you thinking.
The Round About Messages Stamp Set from Stampin’ Up! does a little bit of both.
Alongside the bold words like Hello!, Thanks and Celebrate, you’ll find these fun circular greetings where the words wrap right around the images.
And that immediately gives us something different to play with.
Instead of always placing a sentiment neatly across the bottom or centre of a card, those circular greetings can become part of the actual design.
This week I’ve created three different cards using the Round About Messages Stamp Set, starting with a simple stamped background, then adding layers and finally experimenting with repeated stamping.
If you sometimes look at a new stamp set and wonder how you’ll come up with more than one idea for it, these projects are a great example of how changing just a few design choices can take the same stamps in completely different directions.
Meet the Round About Messages Stamp Set
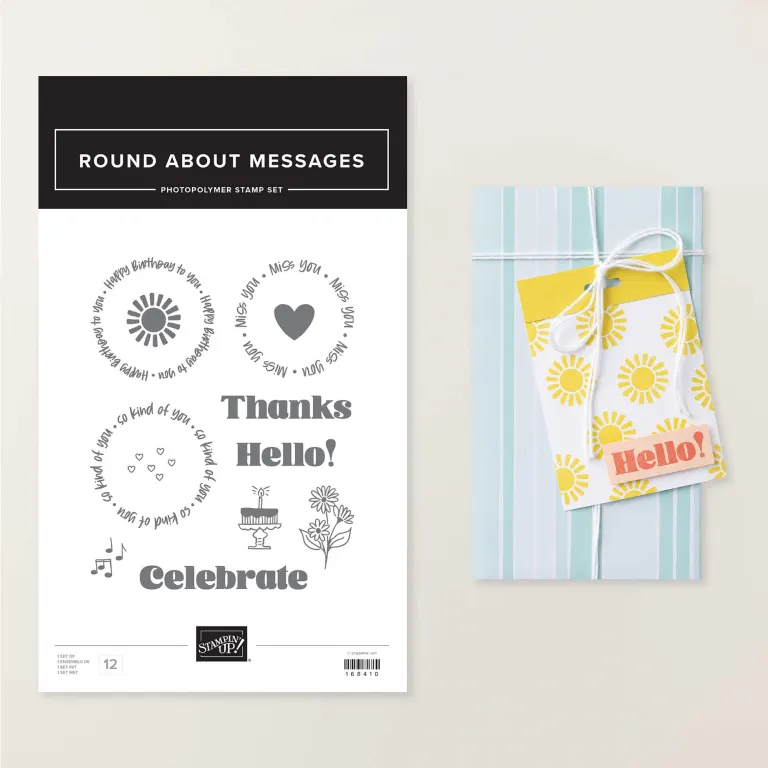
The Thanking You Stamp Set includes:
- 12 photopolymer stamps
- Bold sentiments including Thanks, Hello! and Celebrate
- Circular greetings for Happy Birthday, Miss You and So Kind of You
- Small coordinating images including flowers, hearts, a birthday cake, music notes and a sunburst-style image
- A mix of larger statement greetings and smaller images that can be used together or separately
What makes this set especially fun is that the circular sentiments do more than simply add words to your card — they can become part of the focal point itself.
You can stamp an image inside the circle, layer the greeting over other shapes, or use the individual words and images to create your own backgrounds.
That combination gives you plenty of room to experiment without needing lots of different supplies.
👉 Shop the Round About Messages Stamp Set here
Card 1: Create a Simple Stamped Background
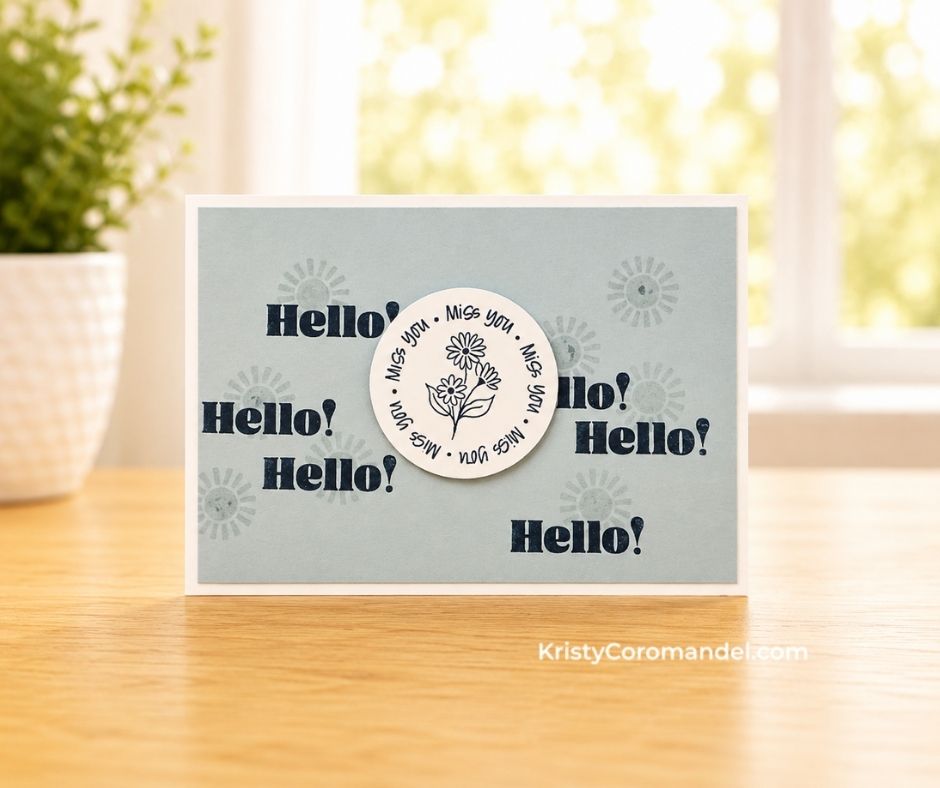
For our first card, I kept the layout nice and simple.
Rather than adding patterned paper, I used the stamps themselves to create the background.
The bold Hello! sentiment is stamped several times across the soft blue cardstock, with the small sunburst image stamped more subtly in the background.
Then the circular Miss You greeting and floral image become the main focal point.
There aren’t lots of layers or complicated techniques here.
Instead, the repetition creates the interest.
This is such a useful technique when you’re not sure what to put behind your focal image. Before reaching for another product, look at the stamps already sitting on your desk.
Could one of them become your background?
Beginner Tip
When creating a random stamped background, try not to space everything too perfectly.
Start with your largest image and stamp it in a few different positions. You can even allow some images to disappear off the edge of your cardstock.
Then use your smaller stamps to fill any areas that feel a little empty.
You’re aiming for balance rather than perfect spacing.
Once you’re comfortable with that, we can start adding some layers.
Card 2: Build a Focal Point with Simple Shapes
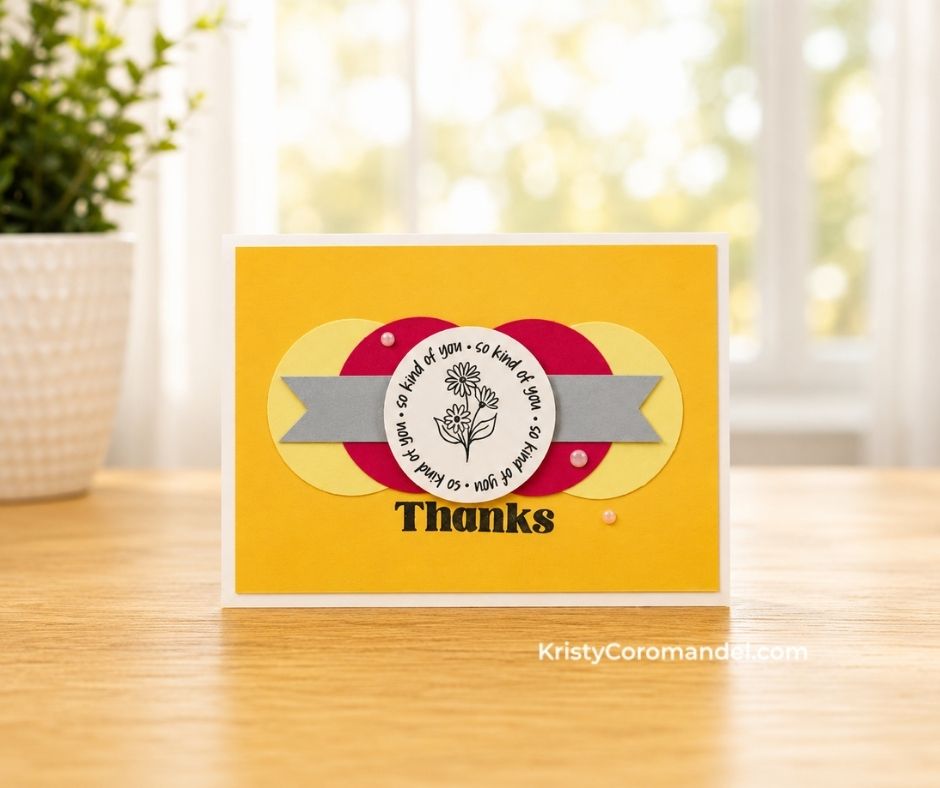
For the second card, I wanted the circular So Kind of You greeting to become the star.
Instead of placing it directly onto the card front, I built a focal point underneath it using overlapping circles and a simple banner.
Those basic shapes add colour and dimension without making the card difficult to recreate.
The bright yellow and pink also give this card a completely different personality from our softer first project.
And this is something worth remembering when you’re trying to come up with more ideas from the same stamp set.
You don’t necessarily need another technique.
Sometimes you just need another layout.
Try taking the same stamped image and adding a mat behind it, overlapping a few shapes or introducing a banner.
Suddenly your focal point feels completely different.
Beginner Tip
Before you glue your layers down, arrange everything loosely on your card first.
Move the circles around.
Try your banner slightly higher or lower.
Place your sentiment on top.
Taking a minute to experiment before reaching for the adhesive gives you the freedom to find the arrangement you like without worrying about making a mistake.
And remember — there isn’t one single “correct” position.
If it looks balanced to you, you’re on the right track.
Card 3: Turn Your Sentiment into a Background
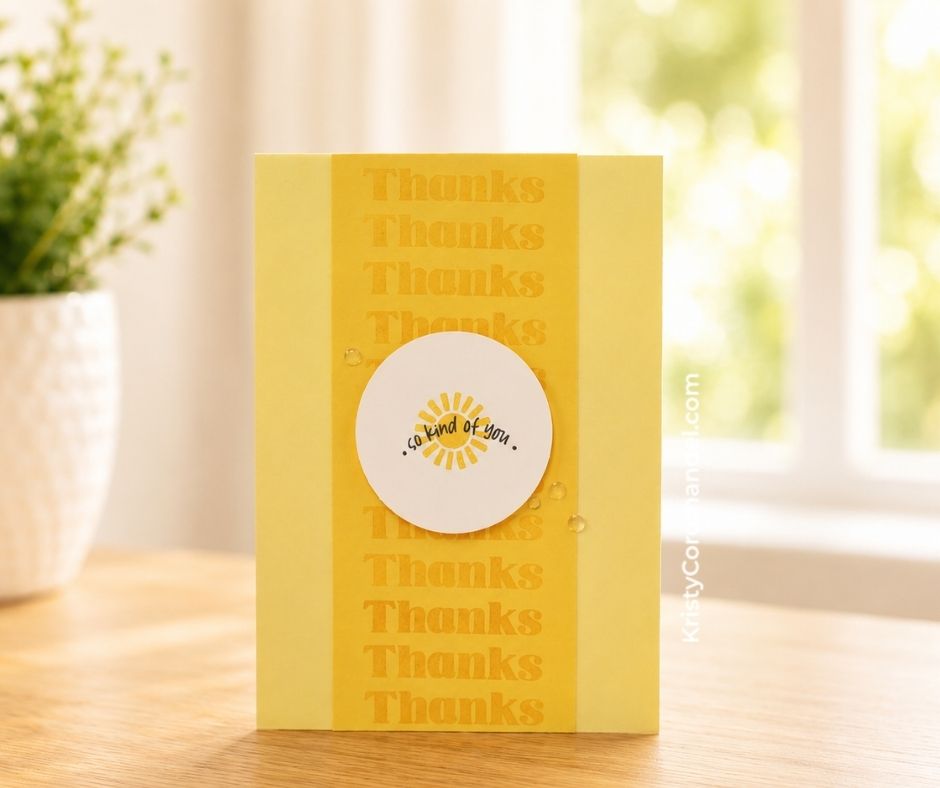
For our final card, we’re looking at the sentiment stamp a little differently.
Instead of stamping Thanks once and making it the focal point, I’ve repeatedly stamped it down the centre panel to create a background.
Because the stamping is tone-on-tone, the repeated words add interest without overwhelming the card.
Then the circular So Kind of You greeting sits over the top and becomes the main focal point.
I love this technique because it encourages you to stop thinking of sentiment stamps as something you only use once.
A sentiment can become a pattern.
It can create texture.
It can become part of your background.
And suddenly one little stamp has a lot more creative potential.
Beginner Tip
If you’re trying repeated stamping for the first time, don’t worry about getting every impression perfectly lined up.
You can use a ruler or grid paper as a guide if you’d like things fairly straight, but small differences are completely fine.
Keeping your ink and cardstock within the same colour family will also make any little imperfections much less noticeable.
The result becomes a subtle background rather than a row of perfectly stamped words.
One Stamp, Three Completely Different Looks
Put these three cards beside each other and you can really see how versatile the Round About Messages Stamp Set can be.
We haven’t changed the stamp set.
We’ve changed how we’re using it.
Card 1: Use repeated images and sentiments to create your own stamped background.
Card 2: Add simple shapes and layers to build a stronger focal point.
Card 3: Repeat a sentiment to create a tone-on-tone background pattern.
And this is one of my favourite ways to approach card making when you’re struggling for ideas.
Instead of asking yourself:
“What completely new card can I make?”
Try asking:
“What could I change?”
Could you repeat the stamp?
Change the colours?
Add some layers?
Turn a sentiment into a background?
Change from landscape to portrait?
Use tone-on-tone stamping?
Move your focal point?
Those small changes are often all you need to take one idea and turn it into another.
You don’t have to start with a completely blank creative slate every time you sit down to make a card.
Which Round About Messages Card Would You Make?
If you’re newer to card making, I’d start with the first card.
Create your own simple stamped background and choose one image to become your focal point.
Then try the second project and experiment with layering a few basic shapes.
And when you’re ready to stretch your creativity a little further, take one of the sentiments from your stamp collection and see whether you can turn it into a background like we did on the third card.
That’s how creative confidence grows — not by suddenly knowing how to make complicated cards, but by trying one small new idea at a time.
Three cards.
One stamp set.
Three completely different looks.
Now I’d love to know — which Round About Messages project is your favourite: the Hello card, the layered Thanks card or the tone-on-tone Thanks card?