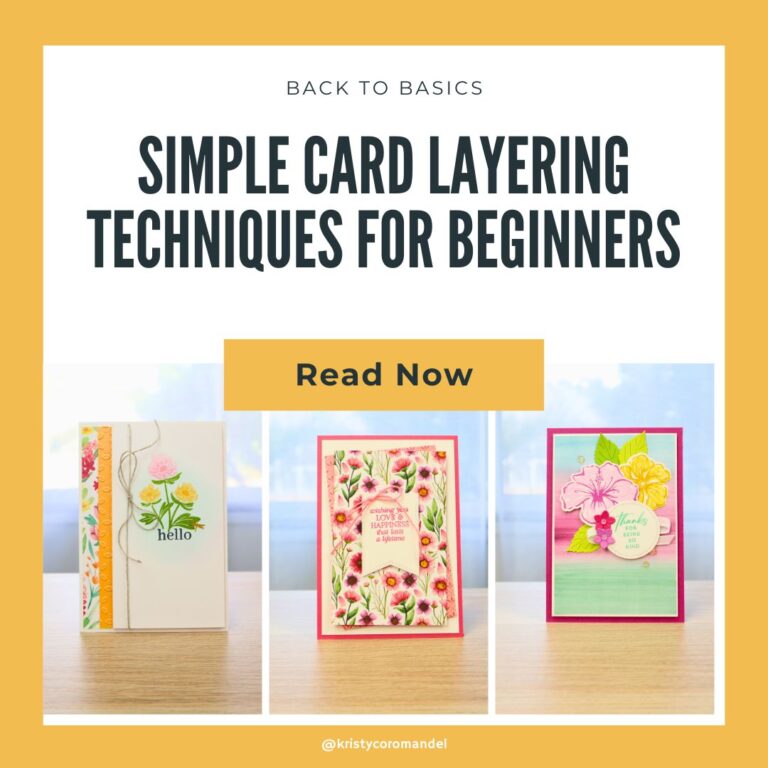
How to Create a Standard Card Base (Beginner-Friendly Guide)
If you’ve ever wanted to make your own handmade cards but weren’t sure where to start, you’re in exactly the right place. This guide will teach you how to create a card base.
One of the very first skills to learn is how to create a standard card base — and the good news is, it’s much simpler than you might think.
Once you master how to create a card base, you can explore various designs.
In this tutorial, I’ll show you step-by-step how to create a clean, professional-looking card base so you can confidently start making your own cards at home. Knowing how to create a card base is the foundation for every handmade card you’ll create moving forward.
Watch the Tutorial
How to Create a Card Base
What You’ll Need
You don’t need a lot of tools to get started — just a few basics:
- A4 cardstock
- Paper trimmer
- Scoring tool (or scoring blade in your trimmer)
- Bone folder (optional but recommended)
Understanding Standard Card Sizes (Beginner Guide)
Before we jump into the steps, let’s quickly simplify card sizes — because this is where many beginners feel stuck.
A standard card base in Australia is typically made by cutting an A4 sheet of cardstock in half.
This gives you:
- Two card bases from one sheet
- A size that fits easily into standard envelopes
You can fold your card:
- Portrait (fold at the top)
- Landscape (fold on the side)
👉 Don’t overthink this — both are correct. It just depends on your design.
Step-by-Step Instructions
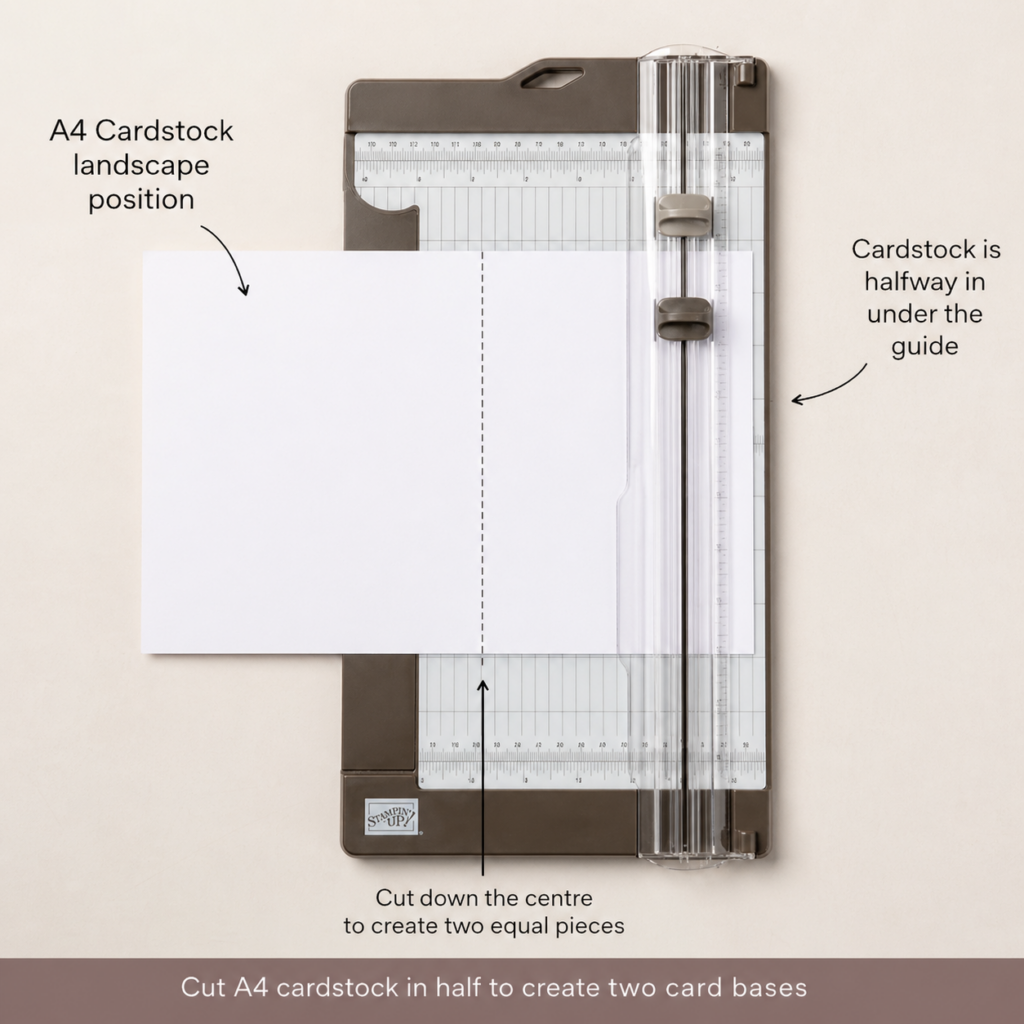
1. Cut Your Cardstock in Half
Start with an A4 sheet of cardstock.
Place it into your paper trimmer and cut it in half to create two equal pieces.
Each piece will become one card base.
👉 This is your starting point — simple and repeatable.
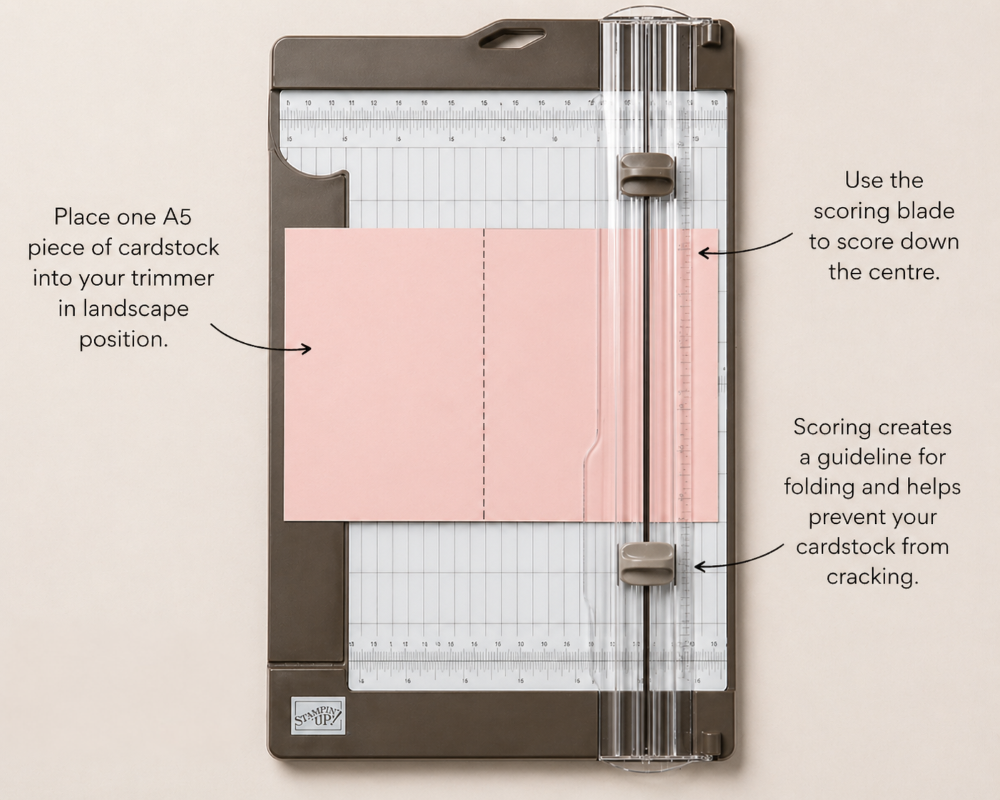
2. Score the Cardstock
Take one piece and place it into your trimmer.
Score it down the centre.
Scoring creates a guideline for folding and helps prevent your cardstock from cracking.
3. Fold Along the Score Line
Carefully fold the cardstock along the scored line.
Take your time here and line up the edges neatly — this is what gives your card a clean finish.
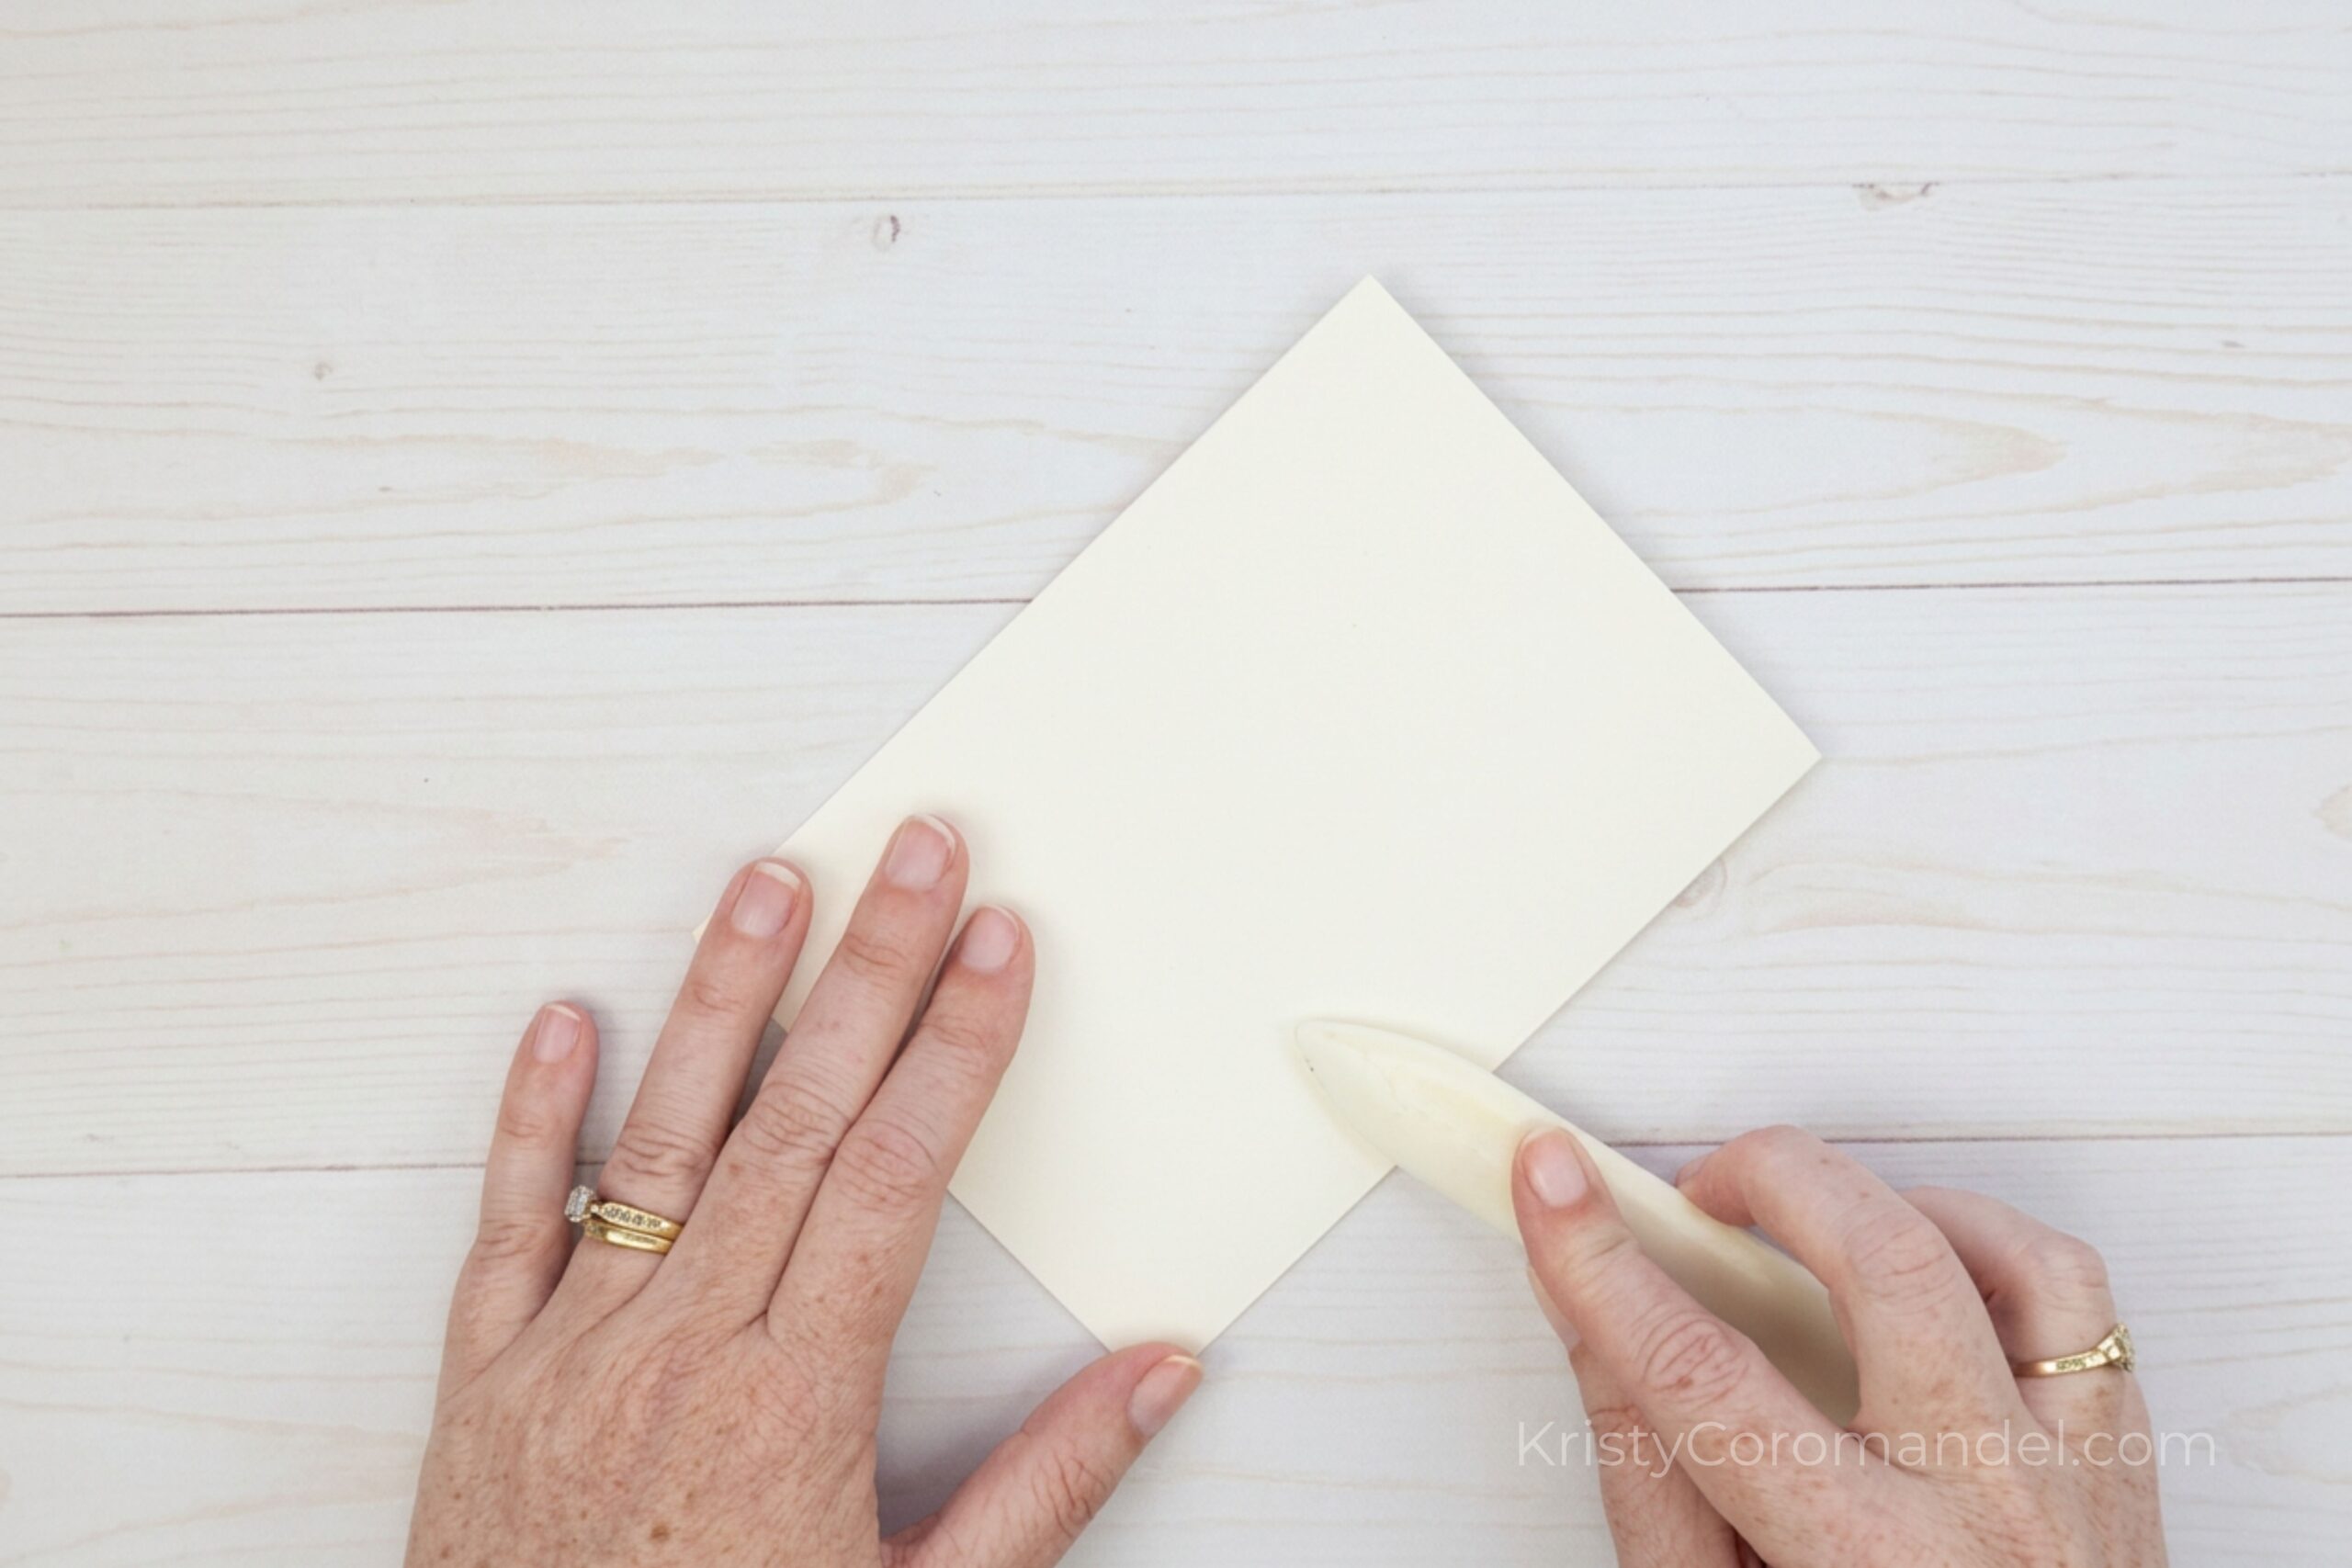
4. Create a Crisp Fold
Use a bone folder to press along the fold.
This step might seem small, but it makes a big difference in how professional your card looks
Why Scoring Matters
If you’ve ever folded cardstock and ended up with a rough or cracked edge, scoring is the step you were missing.
Scoring:
- Creates a clean fold line
- Prevents cracking
- Gives your card a polished, professional look
👉 It’s one of those small habits that builds confidence quickly.
Tools Explained Simply
If you’re brand new, here’s a quick breakdown:
- Paper Trimmer – cuts your cardstock straight and evenly
- Scoring Tool – creates a guideline for folding
- Bone Folder – smooths and sharpens your fold
You don’t need fancy tools — just tools that help you feel in control.
💡 Tips for Best Results
- Always score before folding for a clean edge
- Fold slowly and line up your corners carefully
- Use a bone folder for a crisp, professional finish
- Start simple — accuracy matters more than speed
⚠️ Common Mistakes (and Fixes)
Problem: The fold looks uneven
→ Fix: Line up your corners before pressing down the fold
Problem: The cardstock cracks
→ Fix: Make sure you score before folding
Problem: The card doesn’t close properly
→ Fix: Check your cut is straight and your score line is centred
What to Try Next
Now that you’ve created your card base, here are a few simple next steps:
- Add a stamped sentiment to the front
- Try adding a layer or mat for dimension
- Experiment with different coloured cardstock
- Create 2–3 bases at once so you’re ready to decorate later
👉 This is how you start building momentum without overwhelm.
FAQs
Creating your own card base is the first real step into cardmaking — and once you’ve done it once, you’ll realise just how achievable this hobby really is.
You don’t need lots of tools.
You don’t need lots of experience.
You just need a simple starting point — and this is it.
If you’d like more step-by-step support and simple projects to help you build your skills and creative confidence, you’re warmly invited to join me inside the Paper Crafter’s Academy.
Or, if you’re not quite ready for that yet, start by creating a few more card bases and get comfortable with the process — that’s where confidence really begins.