Three Beautiful Cards You Can Make With the Balloon Festoon Bundle
If there was ever a bundle guaranteed to make someone smile, this would be it. I chose the Balloon Festoon bundle for this showcase because balloons aren’t just for birthdays — they’re perfect for celebrations, congratulations, baby cards, and simply brightening someone’s day. Today I’m sharing three different cards that show just how versatile this bundle can be. Each one takes a completely different approach, using the very same stamps and dies.
Meet the Bundle
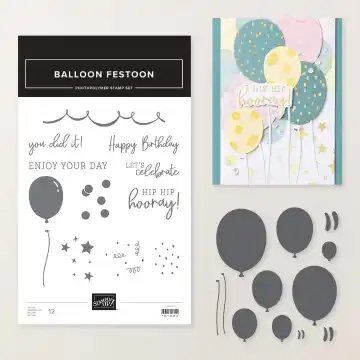
The Balloon Festoon Bundle includes:
- A photopolymer stamp set with balloon images, sentiments (Happy Birthday, Hip Hip Hooray!, Let’s Celebrate, You Did It!, Enjoy Your Day), a scalloped banner/swag stamp, and dot and star accents
- Coordinating dies in a range of balloon sizes, plus balloon-string dies
What I love about this bundle is how much mileage you get out of one set of dies. The balloon shape stays exactly the same across all three cards below, but the way I’ve used it — as a rainbow, as a window, as a single sparkly focal point — makes each card feel completely different.
👉 Shop the Balloon Festoon Bundle here
Card 1: Rainbow Strips Balloon
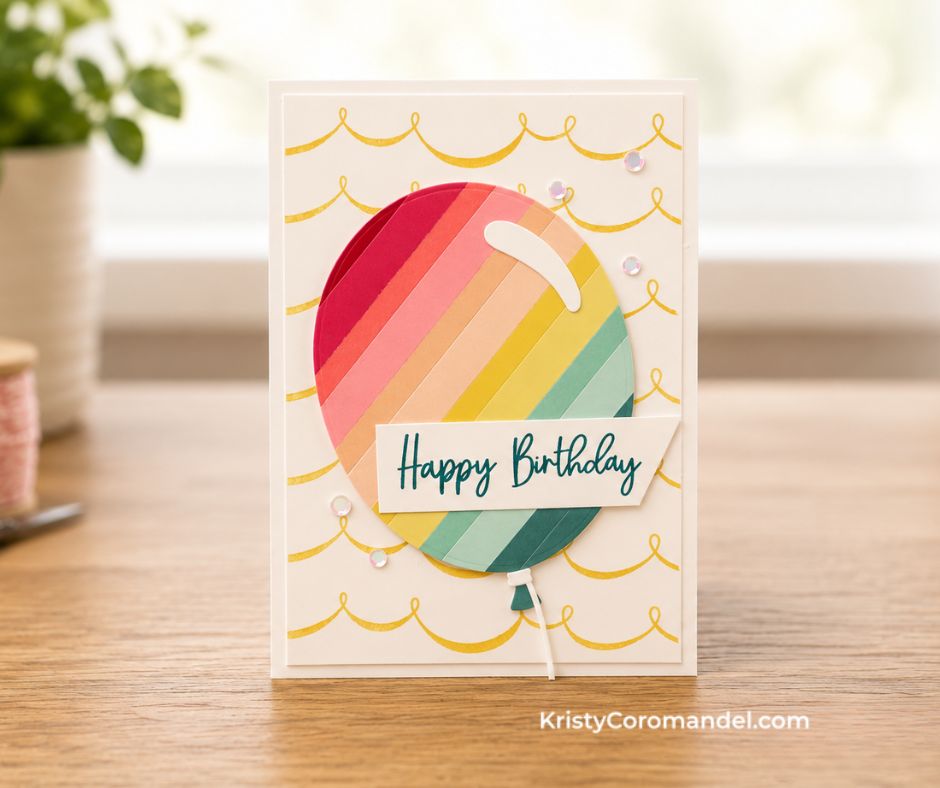
This simple design is the perfect place to start. For this project I created a colourful rainbow balloon using strips of cardstock — a simple technique that makes a big impact, and a great way to use up those cardstock scraps we all seem to collect.
What makes this one work is the colour journey inside the balloon shape: a full run of colour from warm to cool, sitting on a soft cream background stamped with a repeating gold swag pattern. The balloon becomes the clear focal point without needing anything extra around it — clean, bright, and balanced.
This is such an easy one to make your own. Swap the rainbow for a two-colour palette in someone’s favourite shades, change the sentiment underneath, or shift the gold swag stamp to a different ink colour to match the occasion.
Beginner Tip
When you’re working with multiple colours in one shape, run them in the order they sit on the colour wheel rather than at random. It’s a small thing, but it’s what makes a “rainbow” of scraps look intentional instead of chaotic.
Card 2: Hip Hip Hooray Peek-Through
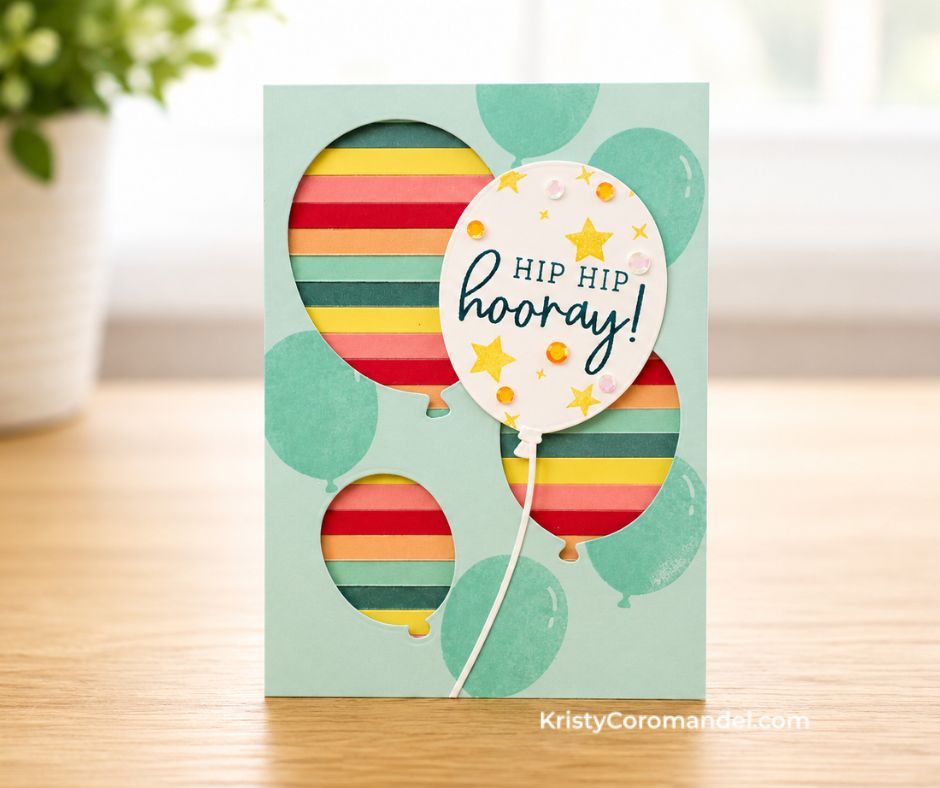
Today’s card has a completely different feel, even though it’s made with the same bundle. Instead of making the balloons the focal point, I used them as windows to reveal colourful striped cardstock underneath.
It creates lots of visual interest while keeping the whole design clean and simple — the eye moves around the three balloon “windows” before landing on the single layered balloon with its Hip Hip Hooray sentiment, finished with a scattering of stars and sequins for a bit of sparkle.
If you want to try this one yourself, the striped paper underneath is where you can really play — swap it for a single bold colour, a patterned paper from your stash, or even vellum for something softer. The sentiment balloon on top can change with the occasion just as easily.
Beginner Tip
Die-cut shapes don’t always have to sit on top of your card. Try cutting them directly into your card front instead — it turns a die you already own into a completely different technique, just by changing where you use it.
Card 3: Clouds & Stars Balloon
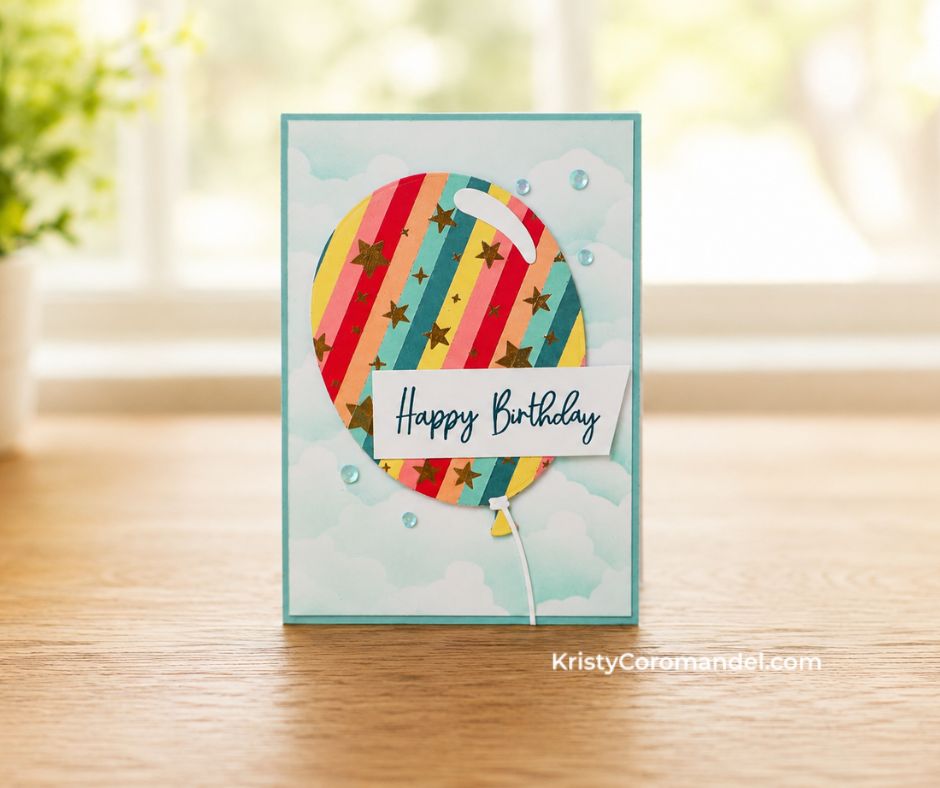
For the final project this week, I wanted to create something that felt light, fun and full of celebration. The soft, cloudy background lets the colourful balloon take centre stage, while a scattering of gold stars adds just the right amount of sparkle.
One of the things I love about this bundle is how changing the background completely changes the look of the finished card — even though the balloon itself is built in a very similar way to the other two. It’s proof that you don’t need a new technique every time to get a fresh result.
Try this one with a different background scene altogether — a plain wash of colour, a subtle stamped texture, or even a night-sky effect with the same gold stars. The balloon does the heavy lifting; the background sets the mood.
Beginner Tip
Changing just the background behind a die-cut design is one of the easiest ways to create variety without learning anything new — the focal element stays the same, but the whole card feels different.
Why I Love This Bundle
Balloon Festoon is one I’ll keep reaching for because it works for so many occasions — birthdays, congratulations, baby cards, thank yous, or just brightening someone’s day. Change the colours, change the background, change the layout, and you’ve got a completely different card every time, all from the same stamp set and dies.
Three cards. One bundle. Three completely different looks. That’s exactly why I enjoy creating these weekly showcases — it helps you see just how many possibilities one bundle can offer.
Which Card Is Your Favourite?
- Card One — the rainbow strip balloon
- Card Two — the peek-through balloon windows
- Card Three — the cloud background balloon with gold stars
Which one would you make first? I’d love to hear in the comments.
I hope these projects have inspired you to look at your stamps and dies in a new way. Sometimes all it takes is one bundle and a few fresh ideas to spark your next handmade card.
If you recreate one of these designs, I’d love to see them! Share your creations and tag me on social media so we can inspire one another.