How to Use a Paper Trimmer — Beginner Cardmaking Guide
Have you ever trimmed a piece of cardstock only to end up with a crooked edge, the wrong measurement, or a cut that just doesn’t look clean? If so, you’re not alone — it’s one of the most common little frustrations when you’re starting out.
Here’s the good news: learning how to use a paper trimmer properly is simple. Once you know a few small habits, you’ll cut your cardstock accurately and confidently every single time — no more wonky edges or wasted paper.
In this guide, we’ll walk through the parts of your trimmer, how to line up your cardstock, and the tiny check that saves so much cardstock. It’s all part of my Back to Basics series, where we build one skill at a time without the overwhelm.
Watch the Tutorial
Prefer to watch and learn? Here’s the full step-by-step video:
What You’ll Need
Keep this simple — no overwhelm here:
- A paper trimmer
- Cardstock
- A pencil (optional, for marking)


How to Use a Paper Trimmer: Step-by-Step
1. Get to Know Your Paper Trimmer
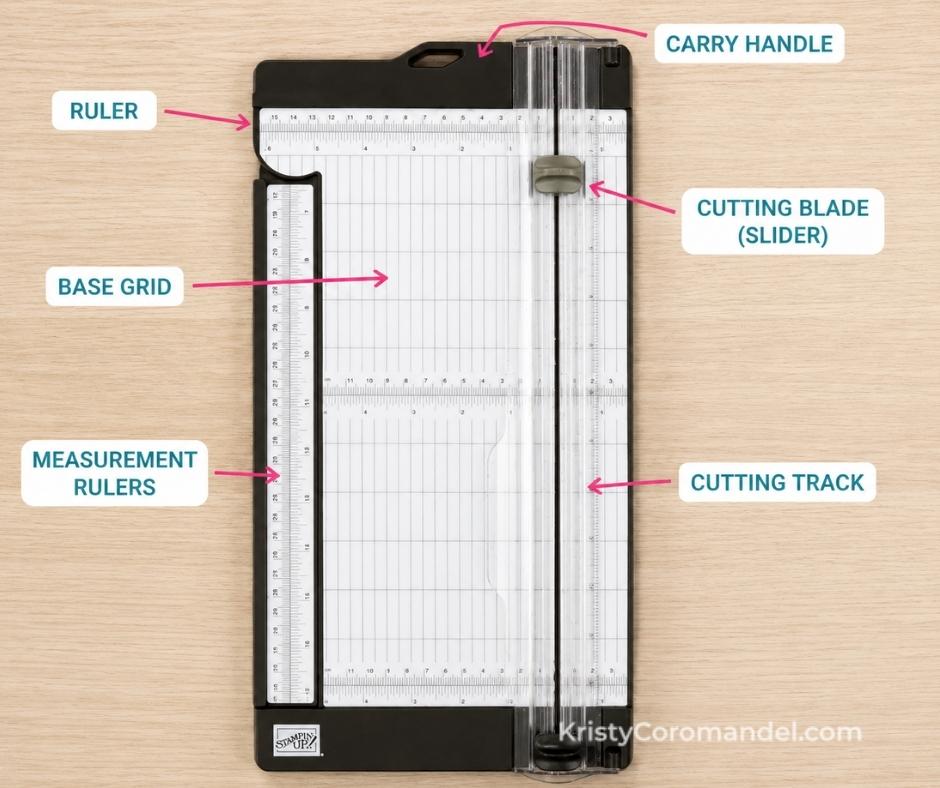
Before you start cutting, take a minute to look at the different parts of your trimmer.
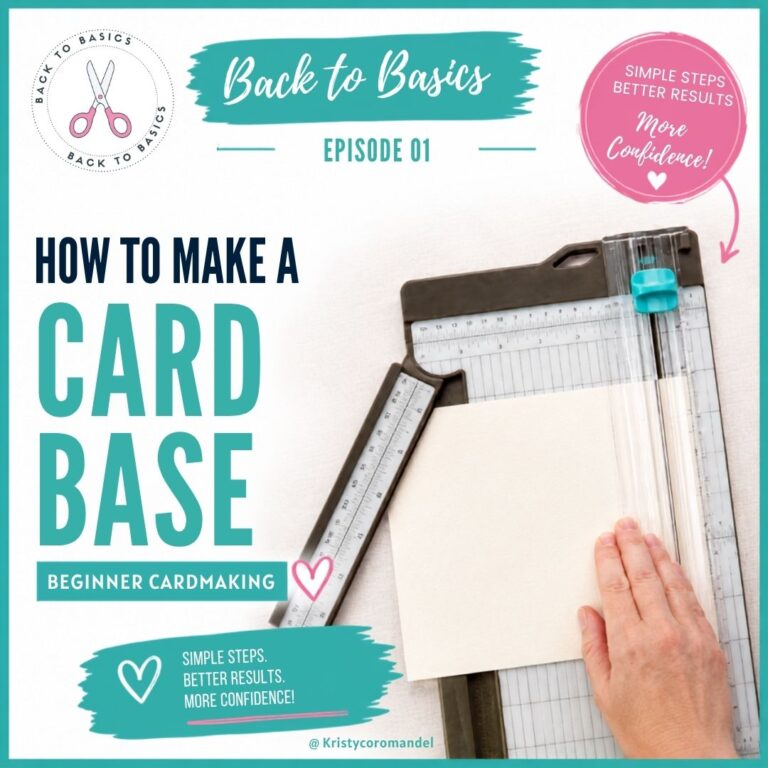
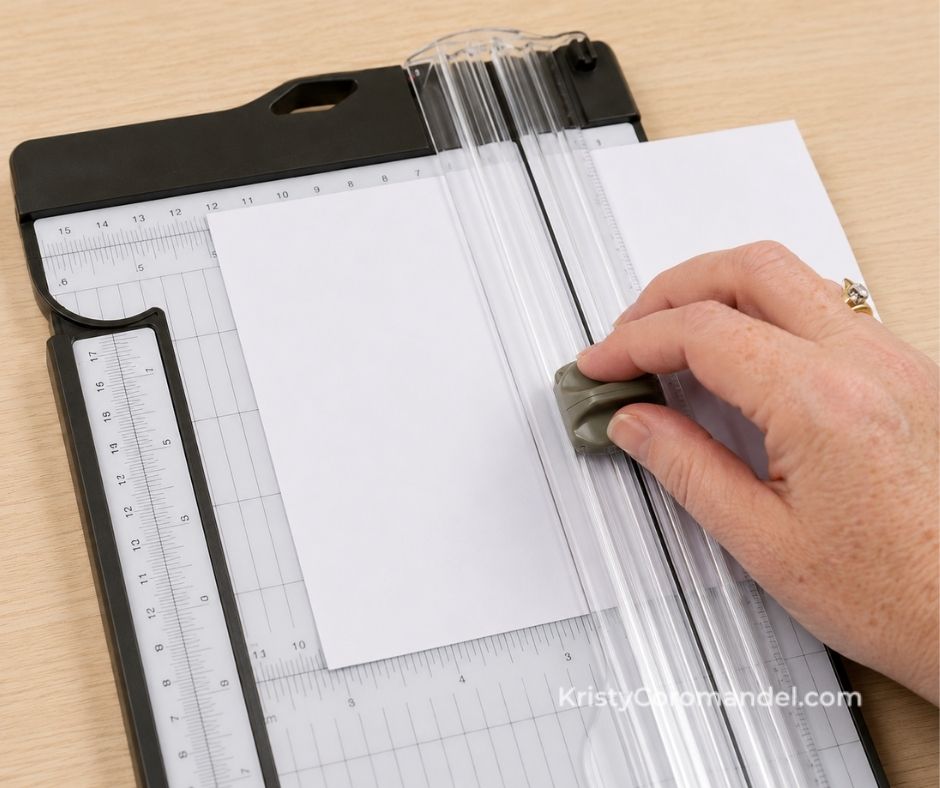
Most paper trimmers have a measuring ruler across the top, a measurement grid on the base, a cutting track, and a cutting blade that slides up and down. Some also include a scoring blade, but today we’re just focusing on cutting.
👉 Knowing where everything sits makes your trimmer feel much less confusing to use.
2. Position Your Cardstock Correctly
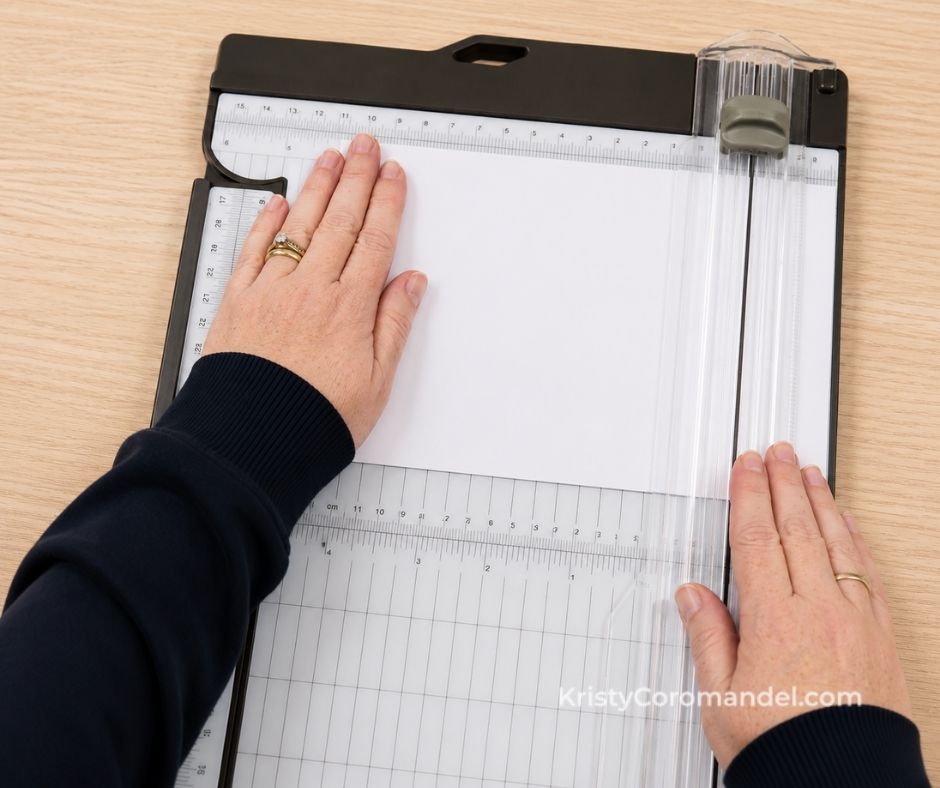
Place your cardstock firmly against the top edge of the trimmer, then slide it across until it lines up with the measurement you need.
One of the biggest beginner mistakes is holding the cardstock in the middle. Instead, keep one hand gently pressing the cardstock against the top ruler while your other hand moves the blade.
👉 Anchoring at the top stops the cardstock from shifting while you cut.
Quick tip: If your paper wants to slide, slow down and re-check it’s flat against the top edge before you cut.
3. Make the Cut
Now slowly slide the cutting blade from top to bottom in one smooth motion. There’s no need to rush.
Steady, even pressure gives you a much cleaner cut than trying to force the blade through quickly. If you’re cutting thicker cardstock, let the blade do the work rather than pressing harder.
👉 One smooth pass beats several rushed ones every time.
4. Double-Check Your Measurements
Before every cut, pause for just a second and ask yourself: “Am I measuring the piece I’m keeping… or the piece I’m cutting off?”
This tiny habit saves a lot of wasted cardstock — and even experienced card makers stop to check before they trim.
👉 A two-second pause now beats re-cutting a whole piece later.
Quick tip: When you need several pieces the same size, cut them one after another without changing your measurement. Every layer stays identical, and your finished cards look neat and professional.
💡 Tips for Best Results
- Anchor your cardstock at the top edge, never in the middle.
- Slow and smooth beats fast and forced — every time.
- Batch same-size pieces by cutting them without changing your measurement.
- Check which side you’re keeping before every single cut.
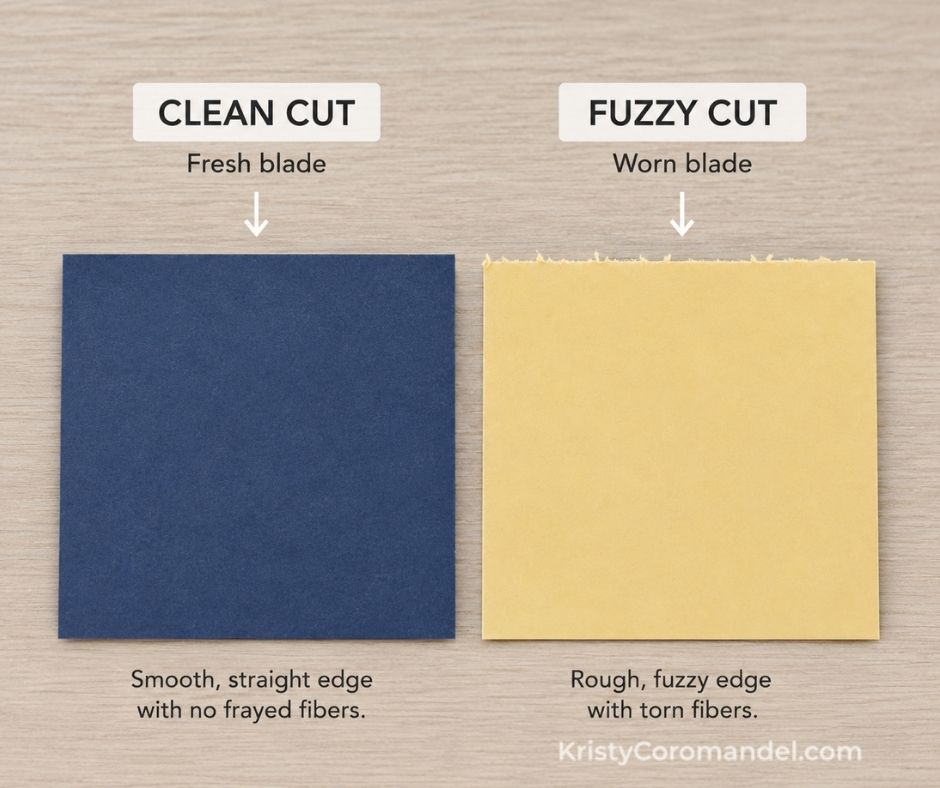
- Replace your blade when cuts start looking rough or fuzzy — a fresh blade makes all the difference.
⚠️ Common Mistakes (and Easy Fixes)
Holding the cardstock in the middle → The paper shifts as you cut, giving you a crooked edge. ✔ Fix: Anchor it firmly against the top ruler with one hand while you cut.
Rushing the blade → Forcing the blade quickly leaves a rough or torn edge. ✔ Fix: Slide slowly in one smooth motion and let the blade do the work.
Measuring the wrong side → You trim the piece you meant to keep and waste cardstock. ✔ Fix: Pause and ask, “Am I measuring the keep piece or the offcut?” before cutting.
Fuzzy, uneven cuts → Your cutting blade has worn down over time. ✔ Fix: Swap in a fresh replacement blade — an easy, inexpensive fix.
What to Try Next
Now that you know the basics, here are a few simple ways to practise:
- Cut a stack of card bases to the same size and see how consistent you can get.
- Trim a set of matching layers for a batch of cards.
- Practise a few thin strips — great control practice for steady hands.
- Try cutting one piece, then measuring twice to build the double-check habit.
👉 Keep it simple — you’re building confidence, not perfection.
FAQs
You’ve Got This
A paper trimmer is a simple tool, but using it well makes every project easier and gives your cards a polished, professional finish. Line up carefully, cut slowly, and double-check before you trim — that’s really all there is to it. Don’t overthink it; these little habits become second nature faster than you’d think.
Keep Building Your Cardmaking Skills
Ready for more? Here are two gentle next steps:
- Work through the rest of the Back to Basics series — one simple skill at a time.
- If you’d like more support as you grow, come and join us inside Paper Crafter’s Academy — a warm, beginner-friendly place to keep building your confidence.
Happy crafting — I can’t wait to see what you create. 💛