How to Ink Your Stamp Evenly — Beginner Cardmaking Guide
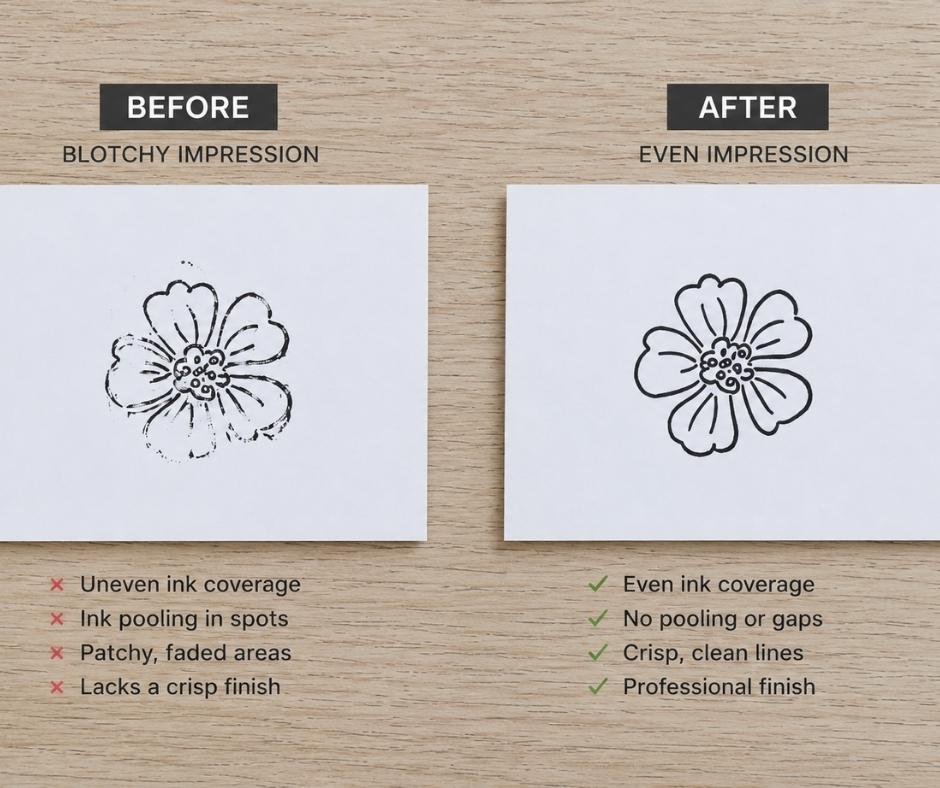
Have you ever stamped an image and ended up with dark patches, faded spots, or a blotchy mess — and blamed your stamp?
Here’s the good news: it’s almost never the stamp. Nine times out of ten, it’s uneven ink. And the fix is simpler than you’d think — it comes down to how you ink your stamp evenly, plus one quick habit most beginners skip: checking your stamp before you press it down.
Already comfortable with the basic stamp? Perfect — this is the next layer. (New to stamping? Start with Basic Stamping Technique first, then come back here.)
In this guide I’ll walk you through inking evenly, step by step, so you get cleaner, crisper impressions every time. This lesson is part of my Back to Basics series, where we tackle one simple skill at a time — no overwhelm.
Watch the Tutorial
Prefer to watch and learn? Here’s the full step-by-step video:
What You’ll Need
Keep this simple — no overwhelm here:
- Ink pad
- Photopolymer (clear) stamp
- Stamping block
- Cardstock
- A few scraps of paper for testing
How to Ink Your Stamp Evenly: Step-by-Step
1. Place Your Ink Pad Flat on the Table
Keep your ink pad sitting flat on your work surface, and bring the stamp down to the ink — not the ink up to the stamp.
👉 If you’ve been tapping the ink pad onto the stamp until now, no problem — bringing the stamp down to a flat pad just gives you more control and more even coverage.
Quick tip: Working on a flat surface lets you see exactly where the ink is landing.
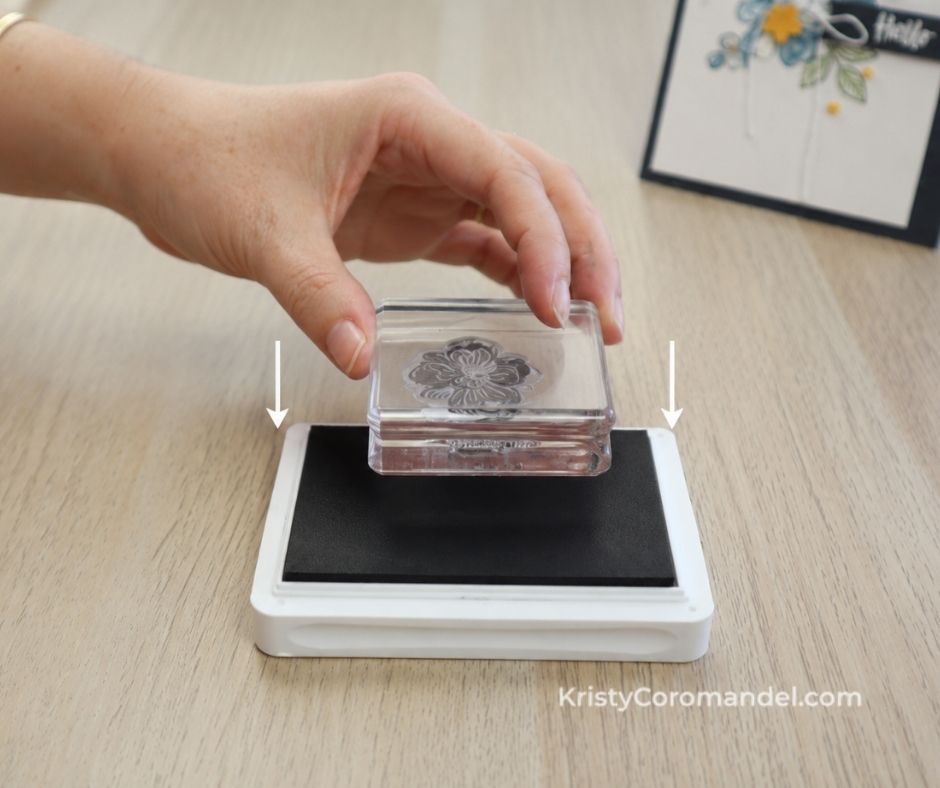
2. Tap, Don’t Press
Gently tap the stamp onto the ink pad using a light, up-and-down motion across the whole surface of the stamp.
👉 Tap — don’t grind, twist, or rock. Light and even is all you need.
Quick tip: Heavy pressure pushes too much ink into some areas and starves others. A gentle tap keeps coverage even.
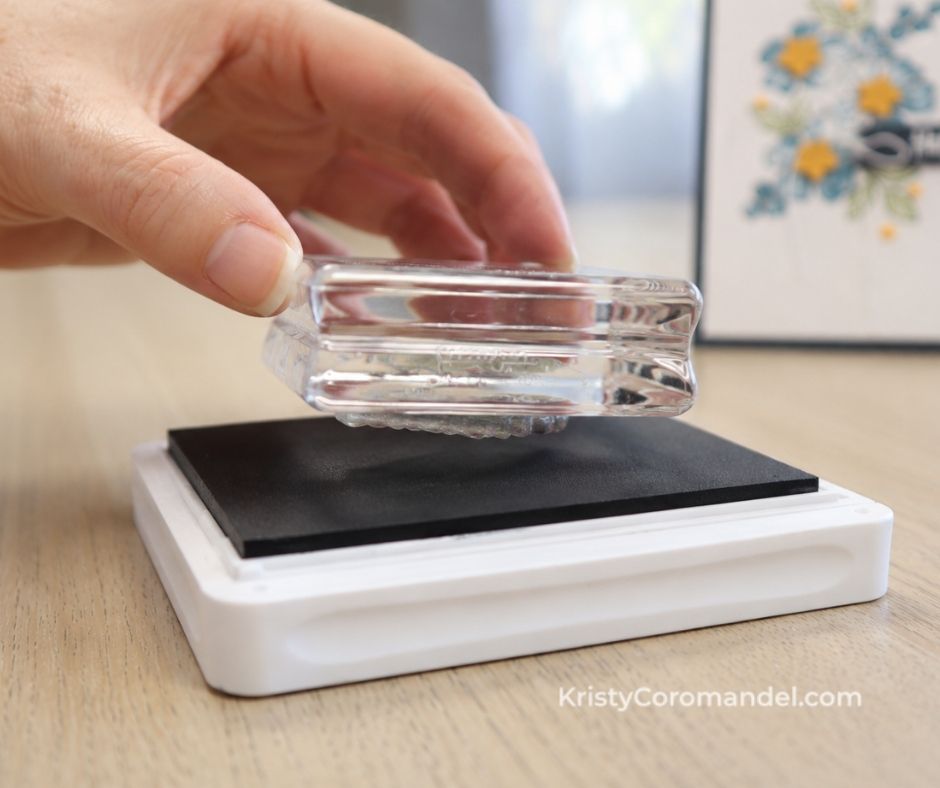
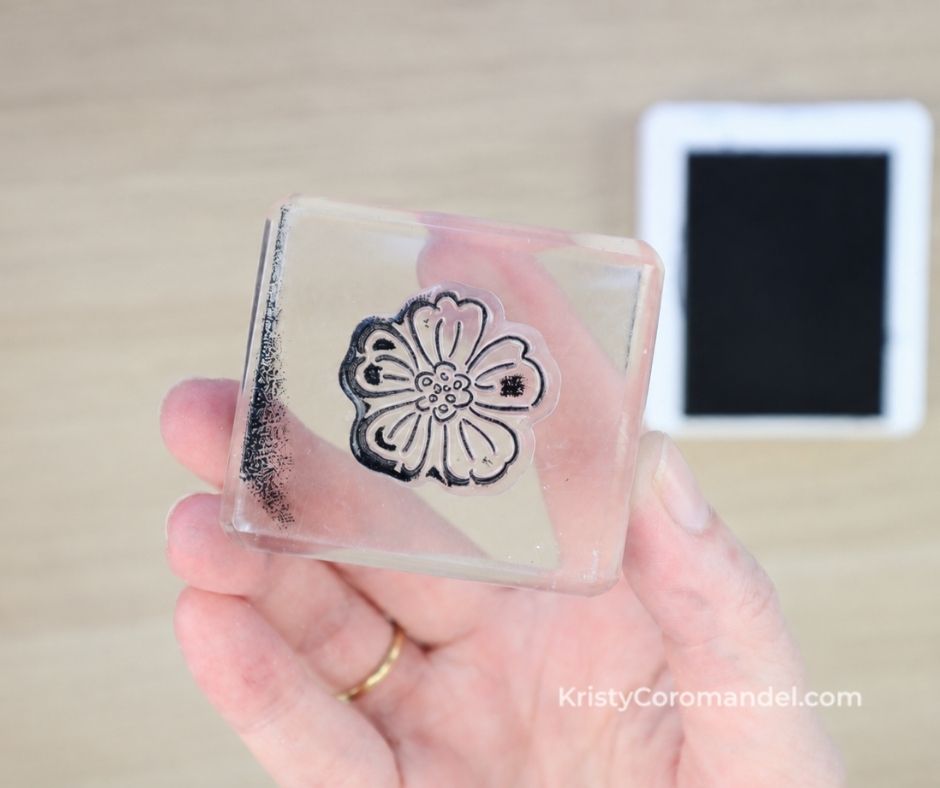
3. Check Your Stamp Before Stamping
TThis is the habit that changes everything. Before you stamp, take a quick look at the surface of the stamp.
👉 You’re looking for a light, even coating — no shiny pools or wet blobs.
Quick tip: If one area looks lighter than the rest, just give that spot another gentle tap. This 2-second check saves so many disappointing impressions.
4. Stamp Your Image
Place your evenly inked stamp onto your cardstock, apply firm and even pressure, hold for a second or two, then lift straight up.
👉 Lift straight up — don’t drag or wiggle — to keep the edges crisp.

💡 Tips for Best Results
- Lower the stamp to the ink, never the ink to the stamp.
- Tap lightly and evenly — pressure is not what gives you good coverage.
- Prime brand-new photopolymer stamps by stamping a few times on scrap paper first.
- Check the stamp every time before you stamp; it only takes a second.
- Steady firm pressure when stamping, then a clean lift straight up.
- Flat work surface every time — it makes even inking so much easier.
⚠️ Common Mistakes (and Easy Fixes)
Adding more ink when it looks blotchy
→ The problem usually isn’t too little ink — it’s uneven application.
✔ Fix: Re-ink with light, even taps across the whole stamp instead of loading on more ink.
Pressing the stamp hard into the pad
→ Heavy pressure floods some areas and leaves others bare.
✔ Fix: Switch to a gentle up-and-down tapping motion.
A new stamp that won’t take ink
→ Fresh photopolymer can make the ink bead up at first — this is completely normal.
✔ Fix: Stamp a few times on scrap paper to “prime” it, then carry on.
What to Try Next
- Practise inking and stamping the same image 3–4 times in a row.
- Try a solid (bold) stamp and a fine-line stamp to feel the difference.
- Test the same stamp on smooth cardstock vs textured paper.
- Prime a brand-new stamp on scrap paper before its first “real” use.
- Stamp a little row of images to build muscle memory.
👉 Keep it simple — you’re building confidence, not perfection.
FAQs
You’ve Got This
Inking evenly is one of those tiny skills that makes a huge difference — and now it’s yours. Take it slowly, give your stamp a quick check each time, and remember that every card maker started exactly where you are. Don’t overthink it; you’ve got this. 💛
Keep Building Your Cardmaking Skills
- Ready for more? Work through the full Back to Basics series — one simple skill at a time.
- Want extra support and deeper guidance as you grow? Come and join me inside Paper Crafter’s Academy whenever you’re ready.
Happy stamping — I can’t wait to see what you create. 💛


