How to Use Clear (Photopolymer) Stamps — Beginner Cardmaking Guide
If you’ve ever picked up a clear stamp and thought, “How does this thing even work?” — you’re definitely not alone. In this guide, you’ll learn how to use clear stamps effectively.
In this guide, I’ll teach you how to use clear stamps effectively, ensuring that you get the best results every time.
Once you learn how to use clear stamps, you’ll see how they can elevate your cardmaking projects.
This guide will show you various tips on how to use clear stamps to achieve stunning designs.
Clear photopolymer stamps can look a little confusing at first, especially if you’ve only ever seen traditional rubber stamps. But once you understand how they work, they’re actually one of the easiest and most beginner-friendly tools in cardmaking.
In this tutorial, I’ll show you exactly how to mount them, position them, and get the best results — plus the common mistakes to avoid so you don’t have to learn the hard way.
This is part of my Back to Basics series, designed to help you move from “Where do I even start?” to “I made this… and I love it.”
Watch the Tutorial
Prefer to watch and learn? Here’s the full step-by-step video:
Learning how to use clear stamps opens a world of creative possibilities in cardmaking.
What You’ll Need
Keep this simple — no overwhelm here:
Understanding how to use clear stamps will enhance your cardmaking experience.
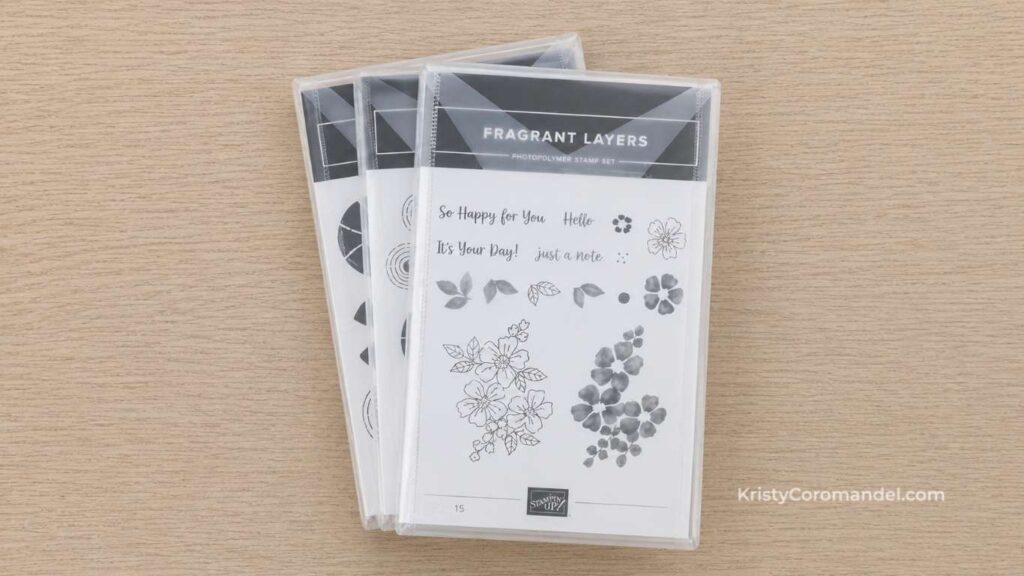
- Clear (photopolymer) stamps
- Acrylic stamping block (sized to your stamp)
- Ink pad
- Cardstock or scrap paper
- Grid paper or quilting ruler (optional — for straight sentiments)
- Stamping mat, foam mat, or silicone craft mat
What Are Photopolymer Stamps?
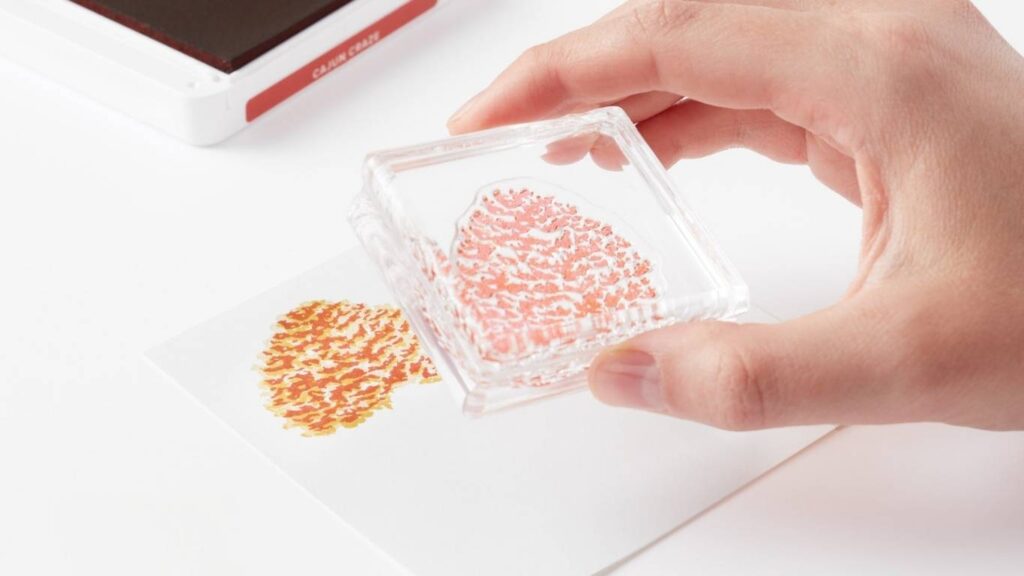
Photopolymer stamps are the clear, flexible stamps that cling directly onto acrylic stamping blocks — no glue or adhesive needed.
Unlike traditional rubber stamps, they’re completely transparent. That means you can see exactly where you’re stamping before you commit to placement — which is what makes them so beginner-friendly, especially for lining up sentiments and layered images.
They can feel a little sticky or floppy at first, but don’t overthink it. After a few uses, they become really easy to work with.
By understanding how to use clear stamps, you can achieve precision and clarity in your designs.
How to Use Clear Photopolymer Stamps: Step-by-Step
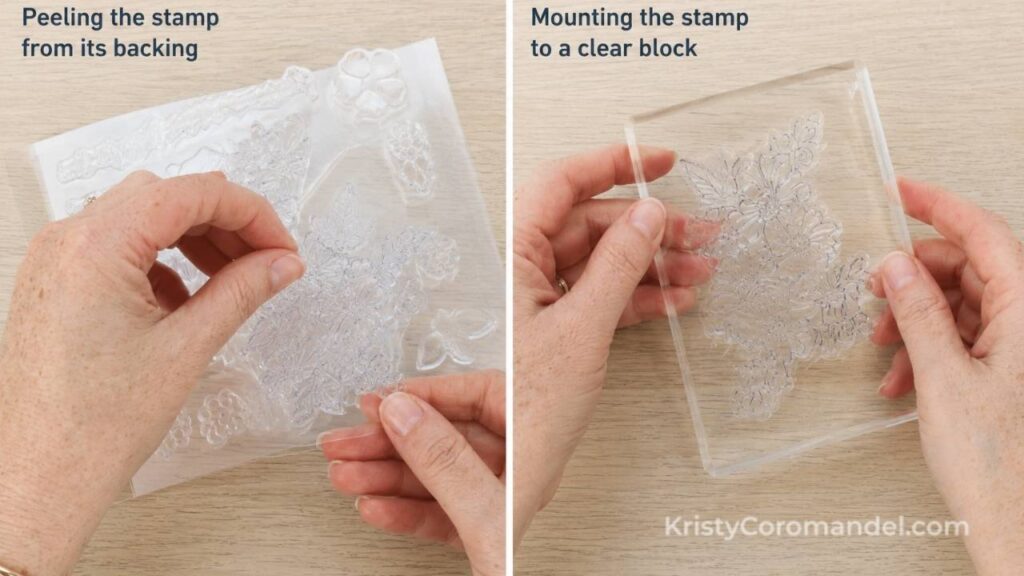
1. Mount Your Stamp onto an Acrylic Block
Carefully peel the stamp away from its backing sheet, then simply press it onto your acrylic block.
The stamp naturally clings to the block — no adhesive needed.
👉 Try to match the block size to the stamp size:
- Small stamps → small blocks
- Larger stamps → larger blocks
Using the right techniques on how to use clear stamps will lead to professional-looking results.
Using the right size block gives you much better control and visibility.
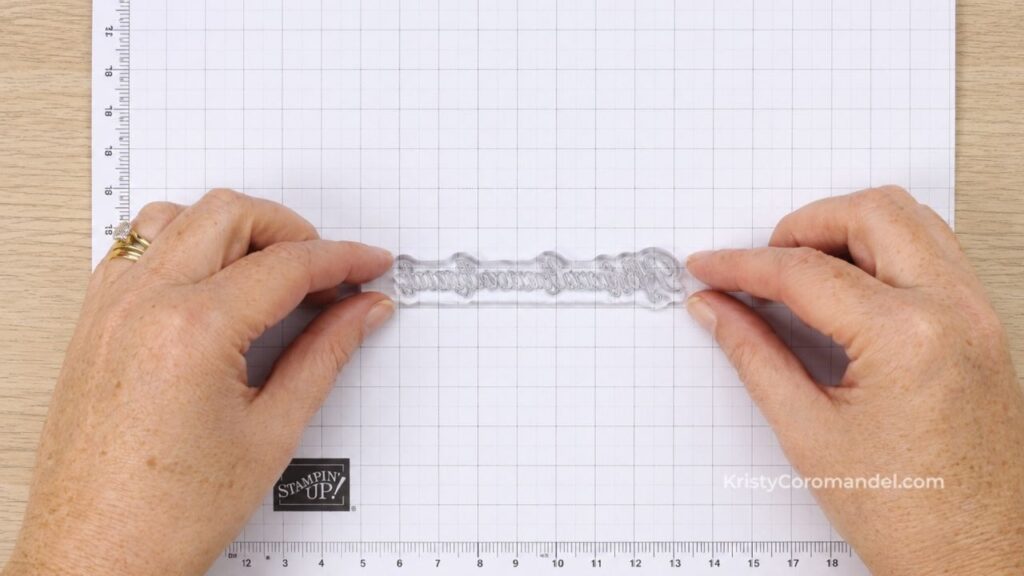
2. Keep Sentiments Straight (Easy Beginner Trick)
If you struggle to get greetings and sentiments perfectly straight, here’s a simple trick that even experienced card makers still use:
- Lay the stamp face-down onto your grid paper
- Line it up carefully with the grid lines
- Then press your acrylic block down onto the back of the stamp
The grid does the work for you — and you’ll get a nice, straight sentiment every time.
Follow these steps on how to use clear stamps to ensure you create beautiful cards.
Quick tip: This works for any sentiment or greeting stamp. Once you try it, you’ll use it every time.
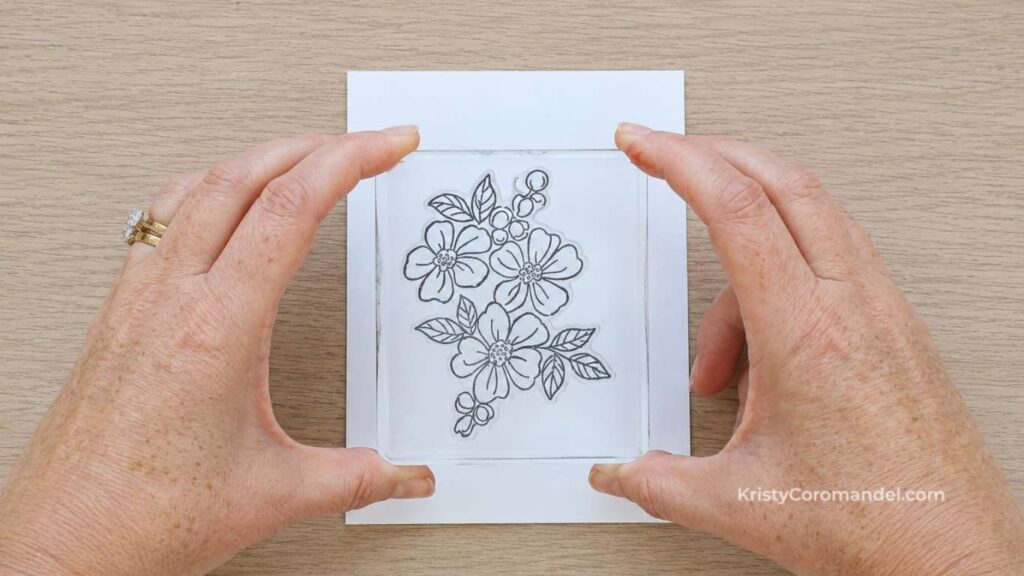
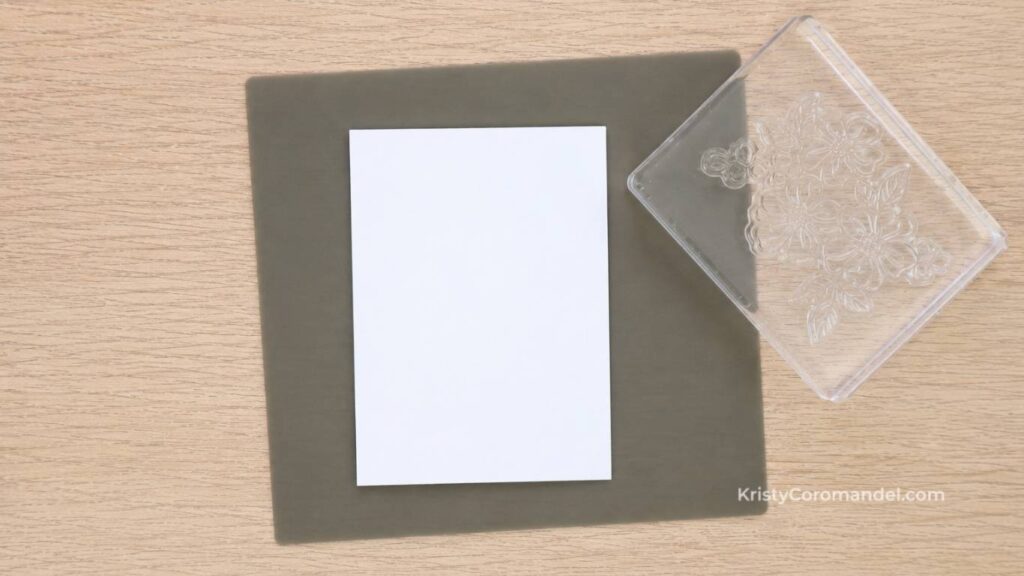
3. Position Your Stamp
One of the biggest advantages of photopolymer stamps is the visibility.
Because both the stamp and the block are clear, you can look directly through them to line everything up exactly where you want it. This makes it so much easier to:
With practice, you’ll master how to use clear stamps, making your cardmaking effortless.
- Centre sentiments on your card
- Align stamped layers accurately
- Place images in exactly the right spot
Don’t hesitate to experiment as you learn how to use clear stamps effectively.
Understanding how to use clear stamps is key to achieving stunning impressions.
👉 Hover your stamp above the cardstock first before committing to placement. Slow down, look through the block, then press down.
This is easier than it looks — just take your time.
4. Use a Stamping Mat for Better Results
If your stamped images sometimes look patchy, uneven, or incomplete — the issue might not be your stamp at all.
First, learn how to use clear stamps before diving into more advanced techniques.
As you continue, mastering how to use clear stamps will become second nature.
Photopolymer stamps are naturally softer than rubber stamps, so they often work best with a little extra cushioning underneath your cardstock.
Try placing one of these under your paper before you stamp:
Many card makers find that knowing how to use clear stamps helps them create unique designs.
- A stamping mat
- A foam mat
- A silicone craft mat
That small amount of cushioning makes a real difference — especially with larger or more detailed stamps.
💡 Tips for Best Results
- Match your acrylic block size to your stamp for better control
- Use the grid paper trick for any straight sentiments or greetings
- Hover and look through the block before you commit to placement
- Use a stamping mat under your cardstock for a cleaner impression
- Handle stamps by the edges — natural oils from fingers can affect ink coverage
⚠️ Common Mistakes (and Easy Fixes)
Touching the sticky surface too much → Natural oils affect how ink sits on the stamp ✔ Fix: Handle stamps by the edges where possible
Not returning stamps to their backing sheet → Stamps lose their shape and cling less effectively over time ✔ Fix: Always pop them back onto the backing sheet after use
Storing stamps in heat or direct sunlight → Photopolymer stamps can crack, warp, or become brittle ✔ Fix: Store flat, in their cases or sleeves, away from windows — especially important here in Australia where heat can cause damage fast
Brand new stamp not inking evenly → New stamps sometimes need a little conditioning before first use ✔ Fix: Lightly rub the surface with a clean eraser or stamp cleaner, or gently wash with mild soapy water, dry thoroughly, and try again
With every project, you’ll see the benefits of how to use clear stamps properly.
What to Try Next
Now that you know how to use clear photopolymer stamps, here are a few simple ways to practise:
- Mount a few different stamp sizes onto matching blocks to get a feel for it
- Use the grid paper trick with your favourite greeting stamp
- Try stamping on different cardstock colours to see how your ink shows up
- Combine what you learned in the last lesson (basic stamping technique) with your photopolymer stamps
👉 Keep it simple — you’re building confidence, not perfection
Don’t overlook the importance of how to use clear stamps in your crafting journey.
FAQs
You’ve Got This
Once you understand how photopolymer stamps mount, position, and behave a little differently from other stamps, they quickly become one of your most useful and versatile cardmaking tools.
The visibility alone makes them such a great choice for beginners — and honestly? Most experienced card makers still reach for them first.
Trying out different methods on how to use clear stamps can enhance your skills.
With time, learning how to use clear stamps will unlock endless creativity.
Keep Building Your Cardmaking Skills
If you’d like more simple, step-by-step lessons like this, you can:
Practising how to use clear stamps is essential for developing your cardmaking abilities.
- Continue through the Back to Basics series (start from the beginning if you haven’t already)
- Or come join me inside the Paper Crafter’s Academy, where I guide you through each stage of your creative journey with support, structure, and confidence-building lessons
Happy stamping — I can’t wait to see what you create.


