How to Stamp Perfect Images Every Time (Beginner-Friendly Guide)
If you’ve ever stamped an image and it came out patchy, smudged, or uneven… you’re definitely not alone.
Stamping looks simple — but there’s a small technique behind it that makes a big difference. The good news? Once you learn the basic stamping technique, everything else in cardmaking becomes easier.
In this tutorial, I’ll show you the simple ink → stamp → paper method so you can create clean, crisp stamped images every time — and start feeling confident with your cardmaking.
This is part of my Back to Basics series, designed to help you move from “Where do I even start?” to “I made this… and I love it.”
Watch the Tutorial
Prefer to watch and learn? Here’s the full step-by-step video:
What You’ll Need
Keep this simple — no overwhelm here:
- A stamp (photopolymer or rubber)
- Ink pad
- Cardstock or scrap paper
- Acrylic block (for clear stamps)
- Flat work surface
Basic Stamping Technique: Step-by-Step Instructions
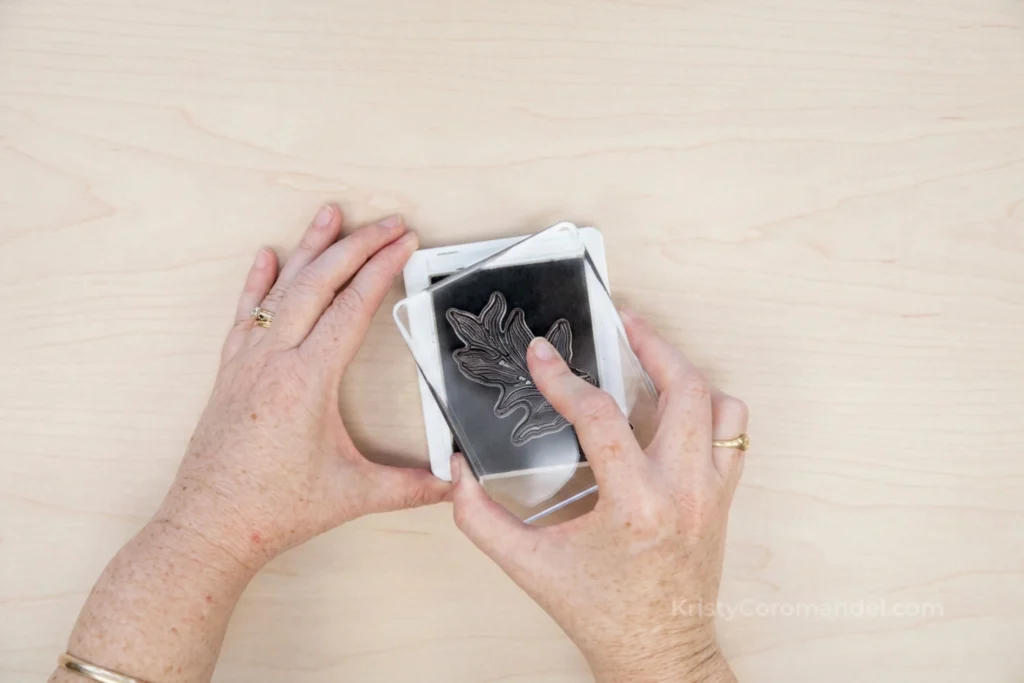
1. Ink Your Stamp
Gently tap your ink pad onto your stamp.
👉 Think tap, tap, tap — not pressing or rubbing.
This helps you get an even layer of ink across the whole surface.
Quick tip:
If your stamp looks shiny and evenly covered, you’re good to go.
2. Place Your Stamp
Bring your stamp down onto your cardstock.
Try to place it confidently where you want it — and avoid moving it once it touches the paper.
👉 Sliding = smudging (we don’t want that).
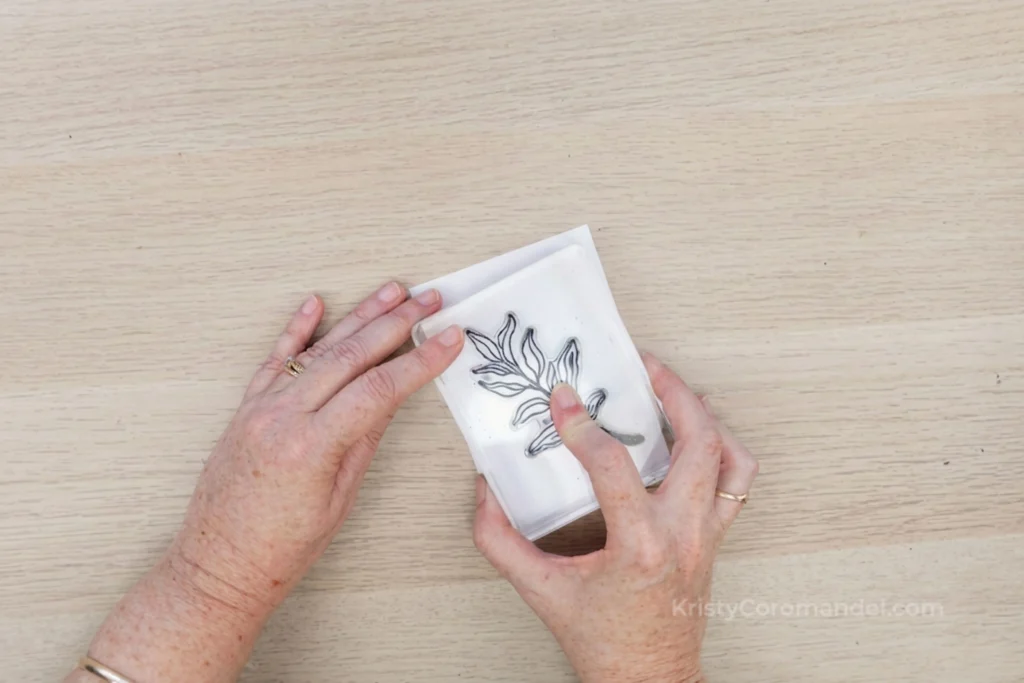
3. Apply Gentle, Even Pressure
Press down evenly across the stamp.
You don’t need to press hard — just firm, gentle pressure.
You can lightly press across different areas to make sure the whole image connects with the paper.
Then lift straight up.
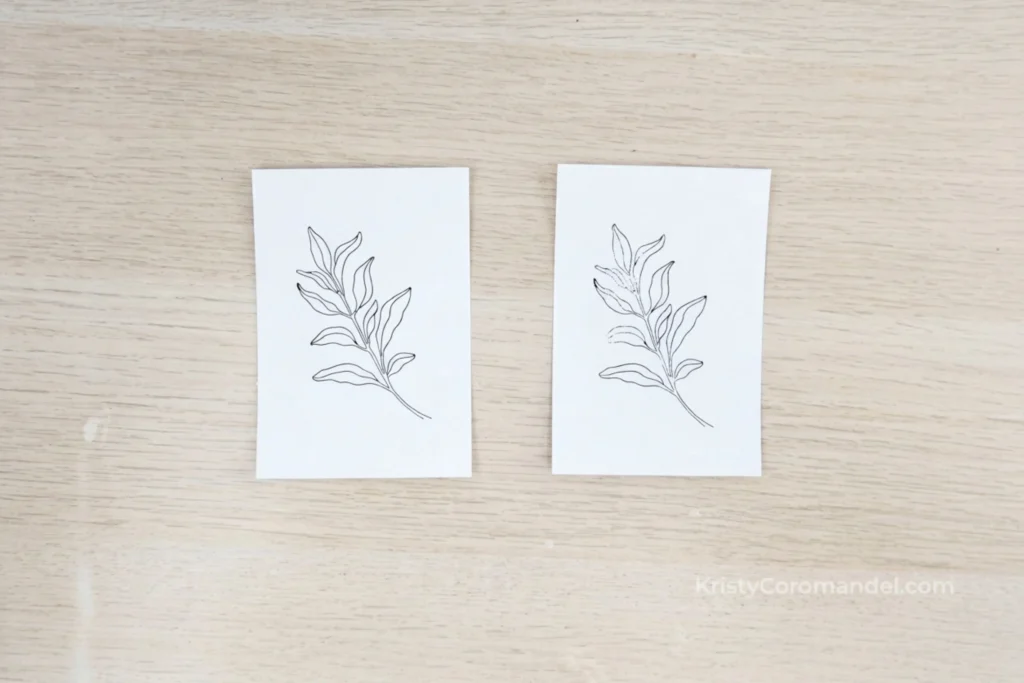
✨ That’s how you get a clean, crisp stamped image.
💡 Tips for Best Results
- Use a flat, stable surface for stamping
- Tap your ink lightly — don’t overload the stamp
- Lift your stamp straight up (no rocking side to side)
- If needed, place scrap paper underneath for a little cushion
⚠️ Common Mistakes (and Easy Fixes)
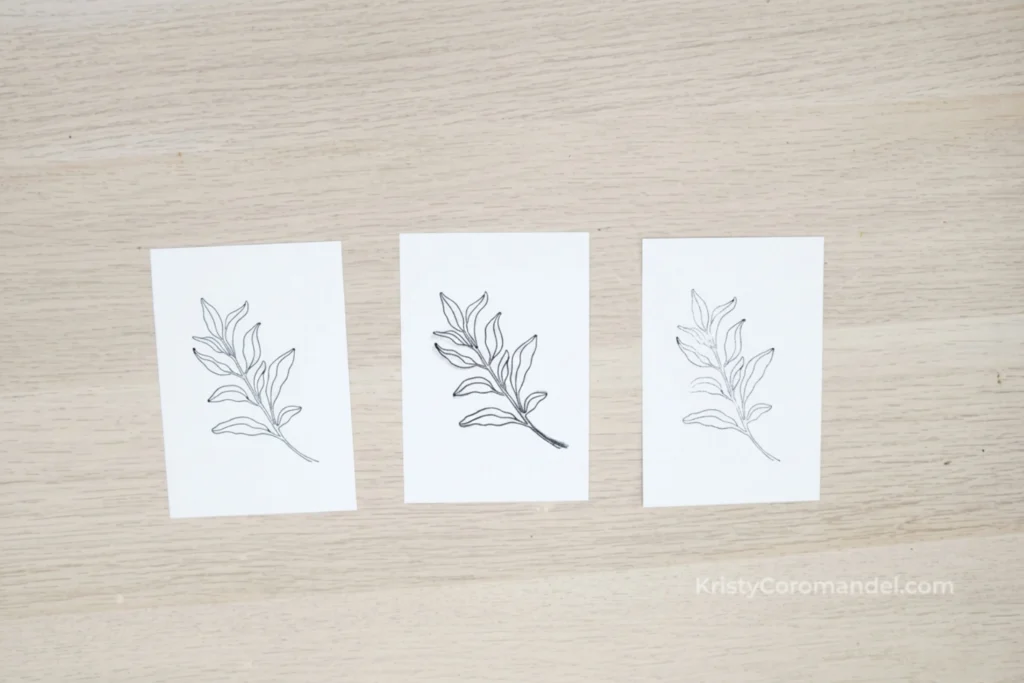
Blotchy or patchy image
→ Too much ink or uneven pressure
✔ Fix: Use lighter tapping and press evenly
Smudged image
→ Stamp moved during stamping
✔ Fix: Place confidently and don’t shift
Faded areas in your image
→ Not enough pressure in certain spots
✔ Fix: Gently press across the whole stamp before lifting
What to Try Next
Now that you’ve got the basics, here are a few simple ways to practice:
- Stamp the same image multiple times to build confidence
- Try different ink colours
- Create a simple background using repeated stamping
- Stamp a sentiment onto a card front
👉 Keep it simple — you’re building confidence, not perfection.
FAQs
You’ve Got This
Stamping is one of those skills that feels small — but it’s actually the foundation of so many beautiful cards.
Once you get this right, everything else becomes easier.
And the best part? You don’t need fancy tools or complicated techniques — just a simple process you can trust.
Keep Building Your Cardmaking Skills
If you’d like more simple, step-by-step lessons like this, you can:
- Continue through the Back to Basics series (start from the beginning if you haven’t already)
- Or come join me inside the Paper Crafter’s Academy, where I guide you through each stage of your creative journey with support, structure, and confidence-building lessons
Happy stamping — I can’t wait to see what you create. 💛