Best Scissors for Cardmaking: How to Choose and Use Them (Beginner-Friendly Guide)
Have you ever tried to cut out a stamped image and ended up with rough edges, wonky curves, or accidentally snipped off part of your design? It’s such a frustrating little moment — and it can make you feel like cutting just isn’t your thing.
Here’s the good news: it might not be your cutting skills at all. Very often, it simply comes down to the scissors you’re using. The best scissors for cardmaking aren’t the most expensive ones — they’re the pair that gives you the most control, and that makes fussy cutting so much easier.
In this guide I’ll show you what makes a great pair of cardmaking scissors, plus a few simple techniques that will help your cutting become smoother, cleaner and a whole lot more enjoyable. This is part of my Back to Basics series, where we focus on one simple skill at a time.
Watch the Tutorial
Prefer to watch and learn? Here’s the full step-by-step video:
What You’ll Need
Keep this simple — no overwhelm here:
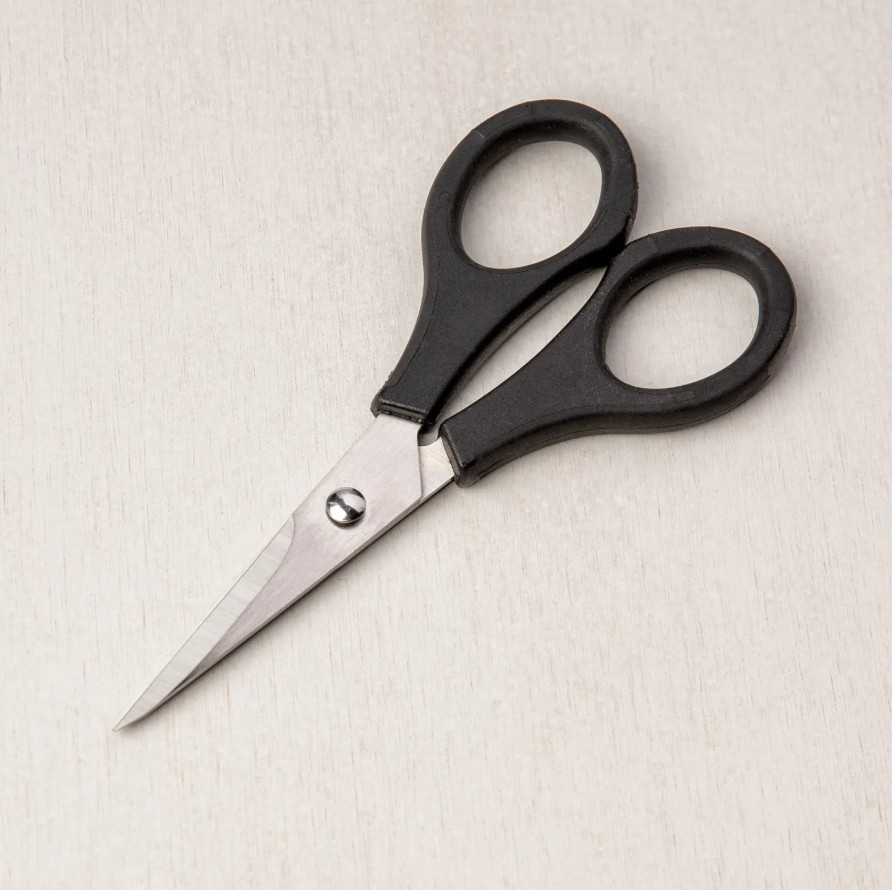
- A good pair of detail scissors (I use the Stampin’ Up! Detail Scissors)
- Cardstock or Designer Series Paper to practise on
- A stamped image to fussy cut
- The safety cover for storing them safely
How to Use Scissors for Cardmaking: Step-by-Step
1. Meet Your Detail Scissors
Start by getting to know what makes a good pair of cardmaking scissors different from the ones in your kitchen drawer.
Detail scissors are designed with paper crafters in mind. What sets them apart is their small, precision blades that stay sharp all the way to the tip — which is exactly what gives you control on those fiddly, detailed cuts. The Stampin’ Up! Detail Scissors have blades just under 5 centimetres long, which is perfect for everyday tasks like cutting cardstock, trimming Designer Series Paper, cutting ribbon, and fussy cutting stamped images.
👉 Because the blades are smaller, it’s much easier to see exactly where you’re cutting.
Quick tip: When choosing scissors for cardmaking, look for small, sharp blades that come to a fine point — not size or price.
2. How to Hold and Use Them
Using detail scissors is actually easier than it looks.
Instead of opening the blades really wide with every cut, try using small, smooth snips and let the sharp blades do the work. When you’re cutting a straight line, use as much of the blade as you comfortably can. For curves and detailed shapes, switch to shorter cuts so you stay in control.
👉 The more relaxed you are, the smoother your cutting becomes — so don’t overthink it.
3. The Secret to Better Fussy Cutting
This is the one tip that changes everything for beginners.
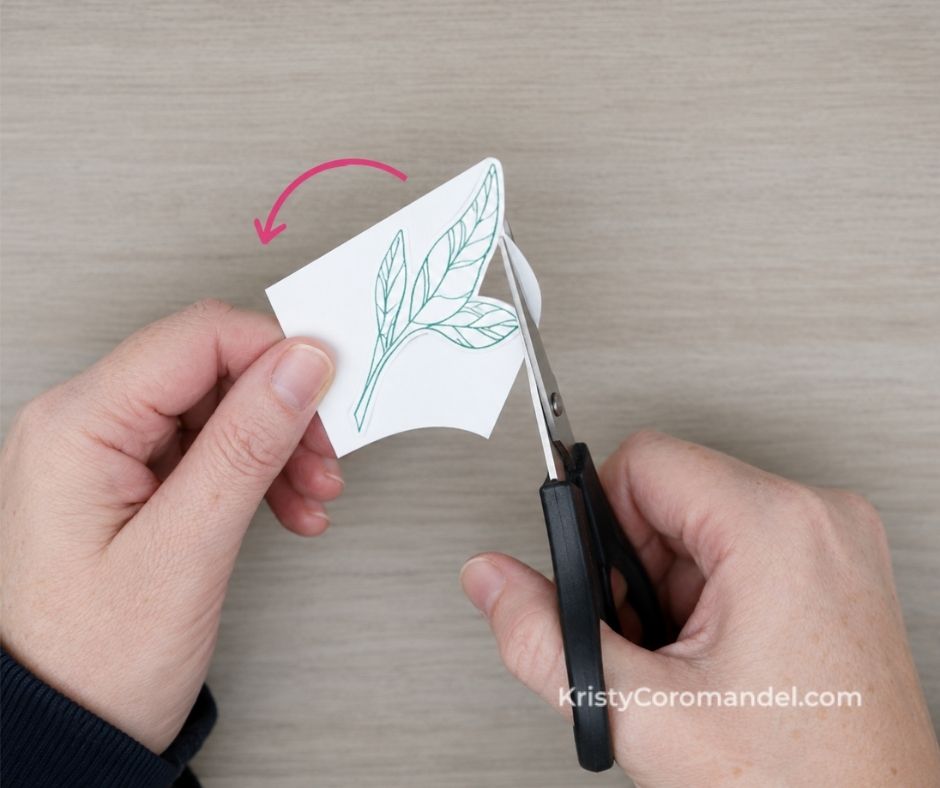
The biggest mistake most people make is constantly turning the scissors. Instead, keep your scissors fairly still and slowly rotate the paper with your other hand. This simple swap gives you much smoother curves and cleaner edges. It feels a little strange at first, then quickly becomes second nature.
👉 Fussy cutting just means cutting closely around a stamped image to lift it off the page.
Quick tip: Leave a tiny white border around your stamped image rather than trying to cut exactly on the line. It’s far easier to do — and it gives your finished project a lovely, polished look.
4. Looking After Your Scissors
A good pair of scissors will last you for years if you look after them.
The simplest habit? Use your detail scissors only for your crafting materials. Avoid cutting packaging, wire or heavy plastics, as these dull the blades quickly. And if you ever get adhesive on the blades, just wipe them clean before putting them away.
👉 A few seconds of care keeps them cutting beautifully for a very long time.
💡 Tips for Best Results
- Sharp blades matter more than expensive ones — control comes from a clean, precise edge.
- Small blades give you the best control for detailed and curved cuts.
- Rotate the paper, not the scissors, for smooth curves.
- Border your stamped images with a fine white edge for a polished finish.
- Craft-only — keep one pair just for paper so they stay sharp.
- Relax your grip; tense hands make choppy cuts.
⚠️ Common Mistakes (and Easy Fixes)
Turning the scissors instead of the paper → Why it happens: it feels natural to steer the blades around a shape. ✔ Fix: keep the scissors fairly still and rotate the paper with your other hand.
Cutting exactly on the stamped line → Why it happens: you’re trying to be precise and remove every bit of white. ✔ Fix: leave a tiny white border — it’s easier and looks more polished.
Opening the blades wide for every cut → Why it happens: it feels like big cuts are faster. ✔ Fix: use small, smooth snips and let the sharp blades do the work.
Using your craft scissors on everything → Why it happens: they’re right there and handy. ✔ Fix: keep a craft-only pair; cutting packaging and plastics dulls the blades fast.
What to Try Next
Ready to build a little confidence with your scissors? Try these:
- Fussy cut a simple stamped shape like a leaf or a heart.
- Practise one smooth curve by rotating the paper as you cut.
- Trim a strip of Designer Series Paper in a nice straight line.
- Cut a stamped flower, leaving a fine white border all the way around.
- Snip a length of ribbon at a neat angle.
👉 Keep it simple — you’re building confidence, not perfection.
FAQs
You’ve Got This
Cutting is one of those quiet little skills that gets so much easier with the right tool and a couple of simple habits. It’s not about working harder — it’s about using the right pair of scissors in the right way.
Give yourself a little practice, and you’ll be surprised how quickly your cutting becomes smoother, cleaner and genuinely enjoyable.
Keep Building Your Cardmaking Skills
- Just starting out? Begin here with the full Back to Basics series — one simple skill at a time.
- Want more step-by-step support as you grow? I’d love to welcome you inside Paper Crafter’s Academy, where you’ll find tutorials, projects and plenty of encouragement.
Happy stamping — I can’t wait to see what you create. 💛